Monday 29 April 2013

Steam Punk Birthday

Like buses, no Rick St Dennis images for days and two come along together.
This card is one of Rick's McSteeme images - Victoria.
A birthday card inspired by the challenge over at Steampunk Junkies where the challenge is Steampunk with a floral twist. Hence the cog type flowers :)
The DP is PaperArtsey, the front and back of the same sheet being seen here. The lacy die cuts behind Victoria are a spellbinders die, The cog flowers are made from X-Cut Chronology watch dies and the little happy birthday sentiment is TH cut from shrink plastic.


Victoria was coloured with promarkers with some touches here and there of metallic paint.
Some apricot coloured pearls were added as extra embellishment.

I am entering this card into the challenge at
Steampunk Junkies - Floral
Lexi's Creations - Happy Birthday

Saturday 27 April 2013

The Circus is in Town

It's been a while since I posted any images from Rick St Dennis. This isn't because I haven't been colouring them but because not many have made it to finished projects that I can share at the moment. This new image has just made it to the store here.
One of the showgirls that Rick drawing so well. I got so much glitter everywhere doing this one, something I'm not used to.
Here we have "The Ring Mistress" Circus Showgirl. I did enjoy colouring her, even with the glitter!
Coloured with my usual promarkers and you can see how much glitter better here.
She is gorgeous isn't she.
The BG was created by adding gilding flakes after stamping images onto plain black bazzill card stock. I used a glue pad from Tsukineko, so much more user and stamp friendly than the flitter glue that seems to have taken the crafting work by storm. It also means that the linen texture of the bazzill was not lost.
Some feathers, gems and a flat gold bead from some dress jewellery that various people know I collect for the sole purpose of taking apart and re-purposing it. Some gathered black tulle was added behind our gal to echo that of her skirt. It doesn't show up much here because it is so fine, but you can see a hint top left where the light hasn't disguised it.
I'd like to enter this card into the following challenges
Just add Ink - Fun Background
Sarah Hurley Challenges - Projects with Character
Addicted to Stamps - Use markers
I love Promarkers - A Square card with something round (the bead)
Penny's Paper Crafting - Anything Goes

Friday 26 April 2013

Something Fishy going on down at Delicious Doodles

Delicious Doodles' challenges always start on a Friday, as if you didn't know by now and it's Team A's turn to host this week.
I've had a few issues with my printer and hence am a bit late getting this one up and running. Sorry girls.
Anyway,
we're here now with Something Fishy
I chose the image Mermaids Revenge for my card this week.
 Some room left for a sentiment - as is my habit - sometimes something different is needed than a simple "Happy Birthday". The BP is from a DCWV stack - "La Creme". The two other panels are left over from my DT showdown piece (see older post) and are from Crafty Chaos. We have die cuts galore here - shells, swirls, as well as the panels. Some black lace and pearls to finish off.
Our fabulous mermaid was coloured with distress inks. Who said mermaids had to be pink?

That's about it folks, apart from to invite you to share your fishy projects with us at Delicious Doodles Challenges.

I'd like to enter this into the challenge at
C.R.A.F.T. Challenges - Fantasy element
Stampin for the weekend - Die cut and/or punches
Penny's Paper Crafty Challenges - Anything goes

Thursday 25 April 2013

Leather and Lace - DT Throwdown

OK my lovelies, who hasn't heard of the DT throwdown as organised by Terra and Tori of the Smeared and Smudged Ning group? If you haven't, then get yourselves over to the forum and read up on it all here. If you are on a DT team, get your fellow teamies involved and come join in the fun.
All the forum members get to vote for their favourite trio of projects as submitted by each team taking part.

The last team to win the coveted trophy was Haunted Design House and therefore the theme for this challenge got chosen by HDH.
LEATHER AND LACE

This challenge - # 4 - I have my HDH DT hat on. I have made some dolls clothes and altered a box.
The doll started life as one of those "teenage" type dolls. She was originally dressed in a cheap cotton shift dress. This definitely did not fit the theme, so stripped down to her "nothings", the process of dressing her started.
Some leggings, made from lace and matching arm coverings. A skimpy little number to cover her "bits" came next - sewn from leatherette left over from covering a couple of dining room chairs. There are also some little metal eyelets, a couple of tiny brads, some chain and jewellery jump rings being used to make the outfit. Some earrings that were picked up in a sale last year. I'd picked up a few bits and bobs like this with a view that they could be put to some use or altered for future projects. I suppose a picture here would give a better idea .... wink wink


 oh yes, I forgot to add that I fashioned a little whip for our Dom from a cocktail stick, some black waxed cotton cordage with a winding of deep red embroidery silk and the metal end is a jewellery "bead separator". More of this embroidery thread into hair braids before tying up with black satin ribbon. I also touched up her makeup. Black and red promarkers came in handy here. The shoes were given a lick of stazon re-inker for that extra gloss. Pink just did not suit this gal.


Now this little beauty needed something to keep her safe. 
Enter one box.
This box started life as a reasonably plain box, A sliding front panel which, when lifted, would have displayed a rather expensive sherry. The box was one of a pair lifted from a skip by hubby. It's great that he knows the strange things that will keep me happy. hehehe 
Leather and lace being the theme of this challenge meant the box needed to be covered with this theme in mind.
Faux leather, as per Andy Skinner's Time Worn course, was put to use here. Some thick card and paint were the mediums used.   
Lace of course and faux lacing down the sides.

The "rivets" are card candy in an old gold colour. The red lacing is red waxed cotton cordage.
The sliding box lid has the stamping as required by the challenge rules. These images are from the "Femdom set" from Smeared Ink. As a member of their Rubber Club, I am lucky to have these in rubber format and can still be obtained, I believe, but the digis are available in the shop, either as singles or the whole set.
These images were heat embossed in black and die cut out before masking and "old paper" distress ink brushed on.
Inside of the box next.
This is covered with a digi paper from a set called Arsenic and Old Lace. Unfortunately Susan of Crafty Chaos no longer operates her shop and the paper is no longer available. Susan is a fellow HDH Minion and using one of her papers seemed a way to keep her involved in the dungeon. Even though she is not crafting at the moment, once a Minion - always a Minion.
So some final pics from a few different angles - so you can see the entire project and before you vote HDH as your favourite team again.


I'd like to enter this into the challenge at
Simon Says Stamp - Anything goes
Through the Craftroom Door - Anything Goes

Monday 22 April 2013

Glitter and Gore

Not your normal type of challenge you'll have to admit, but this week's challenge over at Smudgy Antics is all about the GLITTER AND GORE
To all those that are tough and brave enough to participate, we are inviting you to come join us. We want to see who has the GUTS and the BLOODY SPARKLE-TUDE to play along with our challenge.

My little contribution to the DT collection of fabulous projects is a tag. A small hinged tag in the shape of a heart, and not, for a change, an anatomically correct one. I couldn't get the inside sentiment to fit, hehehe.


The hand holding stamp is a Smeared Ink digi, Dripping Heart from the Bloody Valentine collection. All the other stamps used are rubber from the "Build a Zombie" set, obtained by being a member of the Smeared Ink Rubber Club.
The images were initially stamped onto the diecut shape, the bleeding heart coloured with promarkers and then various red DI brushed over before coating with red glitter embossing powder and heated. The "4" was had written on before adding "aged scarlet" frantage embossing enamel.
Inside
 More stamps from the Zombie stamp set and more glittered embossing powder and yet more frantage enamel on the left with one of the many heads and bodies that can be found in the set, emerging from a grave.
The layering can be seen better here.

A hole punched and ribbon added - it is a tag after-all

Have you the guts to get down and get gorey with us? I do hope so. Come along and show us what you make at Smudgy Antics in the next 2 weeks. Looking forward to seeing you there.

A Classic Birthday Card

A work colleague had a birthday last week and one thing I do is make everyone at work a card tailored to them for their special day.
This card is for one of "the boys" in my team.

I have used stamps from Visible Image thoughout here. Classic Sportscar
with the sentiment "No matter your age"
stamped onto red card and the numbers from Time after time. Then there's that great background stamp of tyre marks as well. The card was masked before over stamping and the paler treads impression on the sentiment layer was created by inking the stamp then stamping twice onto scrap paper before stamping the
The BP is from the Southfield Paper shop. This was layered onto a mat of red then onto a dark cream card base. Gold mirri card, something that has been in the cupboard since I first started making cards 3yrs ago used as a mat for the red image panels. Not something I use very often.
Some red, amber and green dewdrops added as a passing reference to traffic lights.

I'd like to enter this card into the challenge at
Simply Create Too - Use your stash - gold mirri card
Cards for Men - Anything Goes
Paper Crafting Journey - Use a Sentiment

Monday 15 April 2013

Skeletal Remains

A new challenge has started over at Haunted Design House. Two weeks to show us what you can make of/interpret the challenge theme of

"SKELETAL REMAINS"

Any thing to do with that structure within all but the simplest of animals. Skulls, skeletons or bones in general will suffice.
Haunted Design House are being sponsored this challenge by

The Octopode Factory
There's a $15 gift certificate up for grabs for the winner.
The Minions got to play with some of the images that are available in the shop
I got to play with Skull with Roses and Skull Head Sticks.
An ATC.
The background was made with lots of the Skull Head Sticks images. Coloured with promarkers then heat embossed with clear powder. Next came a black mica spray with a touch of lilac. The banner is part of the Skull With Roses digi. The motto is handwritten. The skull image was used 5 times to make the 3-D skull. Cut out and glued together before dipping in UTEE.
Final touch, the last of my chicken bones with some tiny black and red rosebuds.

Get those skeletons out of the closet and get creating peeps.
Looking forward to seeing those projects.

Also please, pretty please, we will all need your support in the next DT Throwdown. Get signed up at the Smeared and Smudged Forum. You never know, you might even like it there! If you are a member of a design team and want to join in - even better.
Check out this link to where all the info is.

Quoth The Raven

I hardly know where to start on this post, except to say this little fat page book with ATCs as the main focus is dedicated to, what must be, one of the most well known poem of Mr E.A.Poe.

What was my project going to be for the challenge blog Quoth The Raven?
Choose 3 things from a list.....

RAVEN 
RIBBON
EDGAR ALLAN POE
LACE
SCARLET
METAL
STITCHING
FLOWERS
FEATHERS
SKULLS
CATS

THEN Rick St Dennis came out with these new digis!!  Mr Poe himself and a trio of ravens.
A light bulb came on. That was at some stupid o'clock when I was trying to sleep, always the way with me. A quick note to self, in case I forgot. Fast forward to the next day when I could get all my bits together. Stamps, colouring tools, card etc.
Are you sitting comfy? This post is picture heavy but I think you'll see why eventually.

The only items from the list that are still missing are the stitching and cats. There is room for them when made.

The cover of my little book was made up of a "tiled" image of the plain raven from Rick St Dennis. Available from his blog.
Printed onto white card but yellow, orange and red distress inks brushed on to colour.
This was folded in half and some black ribbon added as the closure.
The quote is taken from one of the other versions of the raven. Edgar is the other digi available in Rick's shop. Promarkers used to colour.

Inside we have 5 pages plus inside covers
Inside front

page 1
Page 2

Link to digi set there but is available in rubber as part of the "Rubber Club"
Page 3
Page 4
Link to digi set there but is available in rubber as part of the "Rubber Club"
Page 5
Inside back cover
A raven from Ike's Art
can't find this one in the shop but there are more to choose from.

I'd like to enter this little book into the challenge over at 
Quoth The Raven - Choose from a list (as above)


Friday 12 April 2013

Anything Gothic with Delicious Doodles

It's Friday therefore another challenge starts over at Delicious Doodles Challenges. This week it's all about going Gothic. Interpret as you will. The other girls in Team A have produced some stunning pieces of art and I hope you go and admire them all.
My contribution to the line up is a tag using the "Shot Through The Heart" image from, of course, Delicious Doodles.
The image was first printed out four times then coloured with a mixture of promarkers, spectrum noirs, red glitter stickles and silver and black gel pens. The heart itself was coated with crackle accents. For some unknown reason the red spectrum noir colouring has turned orange - bright florescent orange at that. This is something that never happened to me with promarkers. So I guess I won't be using this combo again - unless I need a fluorescent orange in the future
The layering can be seen a bit better here. Some black feathers added for good measure.. 
The base of the tag was coloured by dipping in watered down distress inks - four different colours, fired brick, weathered wood, festive berries and black soot. When happy with that effect I heat embossed a crackle stamp in clear powder on black soot ink. The barbed wire from Visible Image was stamped on using acrylic paint. Then layered two different laces and a black satin ribbon down the side. The tie has a metal cross bow charm attached with one of the three ribbons there.

I'd like to enter this into the challenge at
Anything Goes Challenge Blog - Heavy Metal
Through the Craftroom Door - Anything Goes
Artistic Inspirations - Anything Goes

Monday 8 April 2013

Tic Tac Toe with Smudgy Antics

A new challenge has begun over at Smudgy Antics today. A really easy one as well, I think. The only difficulty is deciding which of the three elements in a line to choose.
I chose two lines in the end. Ribbon, paint and cardboard running down the grid and flowers, glass and cardboard going diagonally.
This is a 6" x 6" piece of card. The insert packaging actually from some new bed linen bought this week.

The images used are all from one of the new sets brought out by Smeared Ink in the last few days. This set is called Specimen Jar. There are more gorgeous images in the set which will get used soon but today just the male image, the set of jars. the butterfly in a jar and the three individual butterflies were used. 

The bottles were digitally overlaid onto the male image before printing. All the images were coloured with promarkers initially. These specimen jars were then given a coat of glossy or sepia or crackle accents as seen to give a glass effect. When dry the whole thing was brushed with old paper distress ink. the butterfly in jar was cut out and layered up. The three individual butterflies each printed out four times were used as a frame. These were threaded onto ribbon after spritzing with coloured inks with added mica. 
The base itself is some re-purposed packaging as previously mentioned. Did you know the the inner corrugated card can be exposed easier if you dampen down one side of the outside first? This dampened layer peels off really easily. Just a blast of the heat gun to dry any unwanted dampness away before the next stage. In my case a layer of blue/green acrylic paint. When this first layer was dry, a layer of orange was dry brushed on. Then the attaching of all the elements using silicon glue. The butterflies and flowers  attached first with some "glass" dewdrops in the flowers. 
Then the main image. A TH fragment (glass) was first adhered using more glossy accents over the eye area.

Then finally attached to the main frame with more silicon to ensure the depth. Finished.

Don't forget to go look at the projects from the other girls, the links, as always, are on the Smudgy Antics Blog as well as my side bar. Only half the team are playing this week. There'll be more from the other DT next week to inspire.

I'd like to enter this into the challenge at
Mema's Crafts - April Anything Goes
Digi Sketch - butterflies and/or Roses and/or Sketch

Sunday 7 April 2013

first w/end freebies with RSD

It's become a bit of a tradition now that Rick St Dennis gives away a freebie digi image on the first weekend of the month. This weekend is no exception. This month though there are THREE digis up for grabs.

That's right THREE!!

All that people need to do is go visit all three blogs that are the centre of activity and showcases.

For my part I made a tag using the image that can be found on the blog that is dedicated to the more "alternative" images - Airless Chambers


The image is called "Art on the Brain" and will be going into the shop after this weekend.

The other two blogs that you will need to visit are the former challenge blog of Sparkle and Glitter - this is going to be the blog dedicated to all those sweetness and light images and of course Rick's own blog in which the more middle of the road images will be showcased, amongst other things of course.

If you want to know how this tag was made carry on reading.
The image was coloured using promarkers.
First up was the crackle stamp inked using a multi coloured "Big and Juicy" ink pad which was then heat embossed with clear powder to set. The different coloured distress inks laid down on my glass mat and spritzed with water. The tag was placed down in this ink a few times, drying between each application. This gives a paint palette look to the tag. Dried again before dry brushing more distress inks around the edges.
The die cuts are from spellbinders cut from scraps of textured cardstock. The "Artist" stamp is TH and stamped in green and black stazon slightly askew to give a more 3-D look. Finally some fibres for the tie at the top.
There's a few more hours left to get your images, so get a move on before they are removed and up for sale in the shop.


I'd like to enter this tag into the challenge over at
Left of Centre - ribbons or twine/LOC
Inky Chicks - Use a background stamp (crackle stamp)

Friday 5 April 2013

A Scottish Castle with Delicious Doodles

First time I've had a chance to sit at my own pc for any length of time in a couple of days. Must get this card that I made blogged I thought.
The occasion was a work colleague's birthday. A true Scotsman he is.  What more could I give than his own Scottish Castle? The new image from Delicious Doodles fitted the bill to a T.
The base paper is from TH Christmas collection but the washed out/weather beaten distressed look was ideal I thought. I stamped "Happy Birthday" all over in "weathered wood" and "stormy sky" distress ink.The creamy off-white strip is a piece of pre-embossed core-dinations, again having that weather worn old look to it. Some red/white twine as a passing reference to his favourite footie team. A few washed out looking brads to finish off the base of the card.
The image - Delicious Doodles, A Scottish Castle
This was painted over with different distress inks to give that subtle water colour look.
Four layers were used
This shows the layering a bit better.
I'm glad to say it was well received.

I'd like to enter this card into the challenge at
Simon Says Stamp - Happy Birthday
Paula Holifield's new challenge blog - A Little Bit Crafty - Anything Goes
Emergency Crafters challenge - Beat the blues / with a nautical theme
Catered Crop - Use Twine

Monday 1 April 2013

Bare Bones - CAS with HDH

Ready for a new challenge at Haunted Design House?
Ready to make Something with absolutely no embellishments?
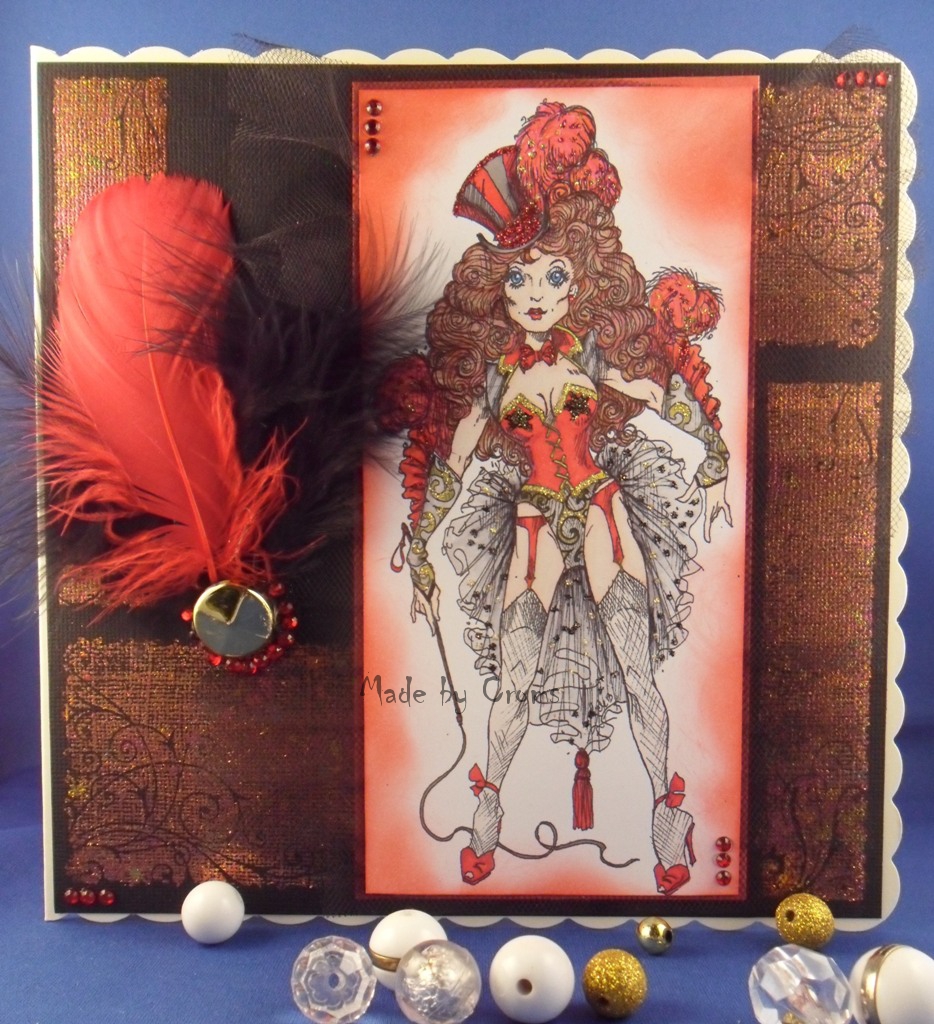
This is a hard one for many people. I know I always want to add something more.
Even this project I have here for you all - I left off the coloured stones. I let the images and colour talk.

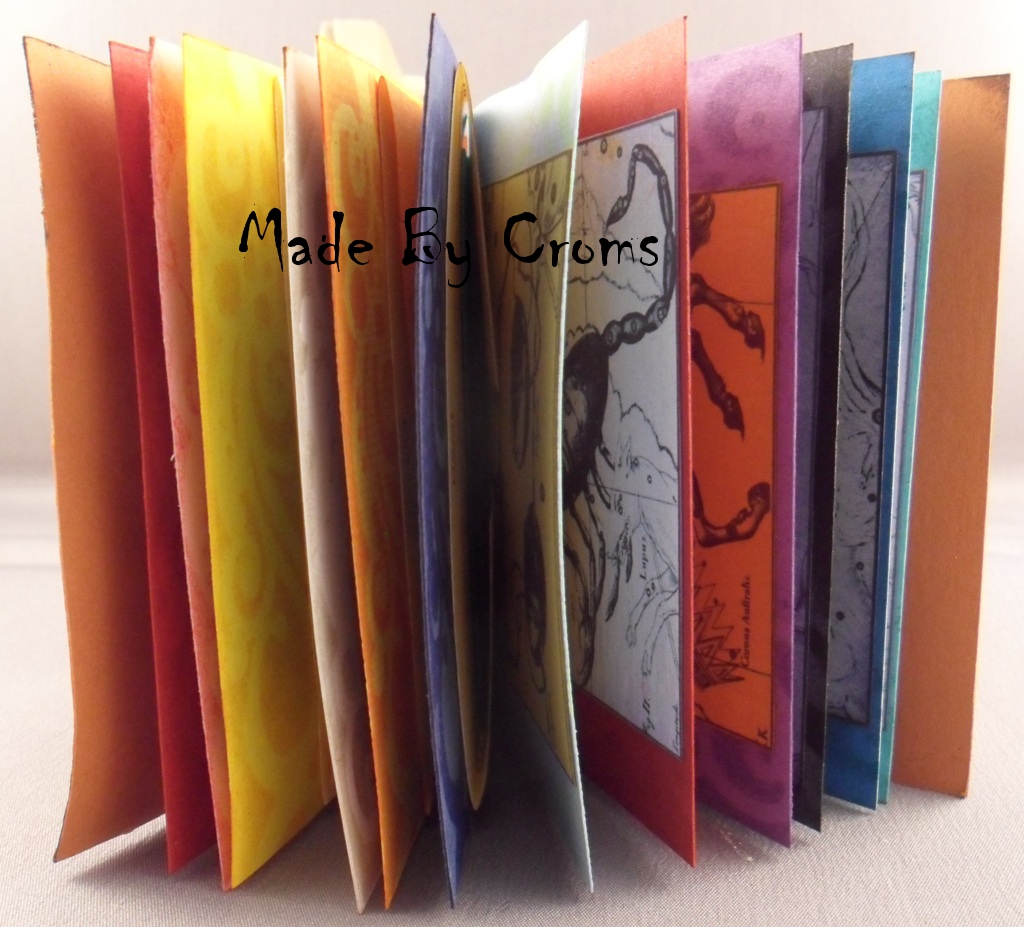
This is picture heavy so I hope you've a nice cuppa at hand.
It is a little ATC book. A collection of 12 ATCs. They all follow the same format, the same mask was used throughout and the images were all from the same digi set. The pieces of card all came from my scrap box.

The cover of the little book was made from a single piece of dark orange card
 The image was found on the internet. printed and cut out the central circle then adhered.A layer of rock candy then painted on and when dry, plenty of "old paper" distress ink applied.


 'Scuse the fingers, but I scrubbed up first before taking the pics.

 
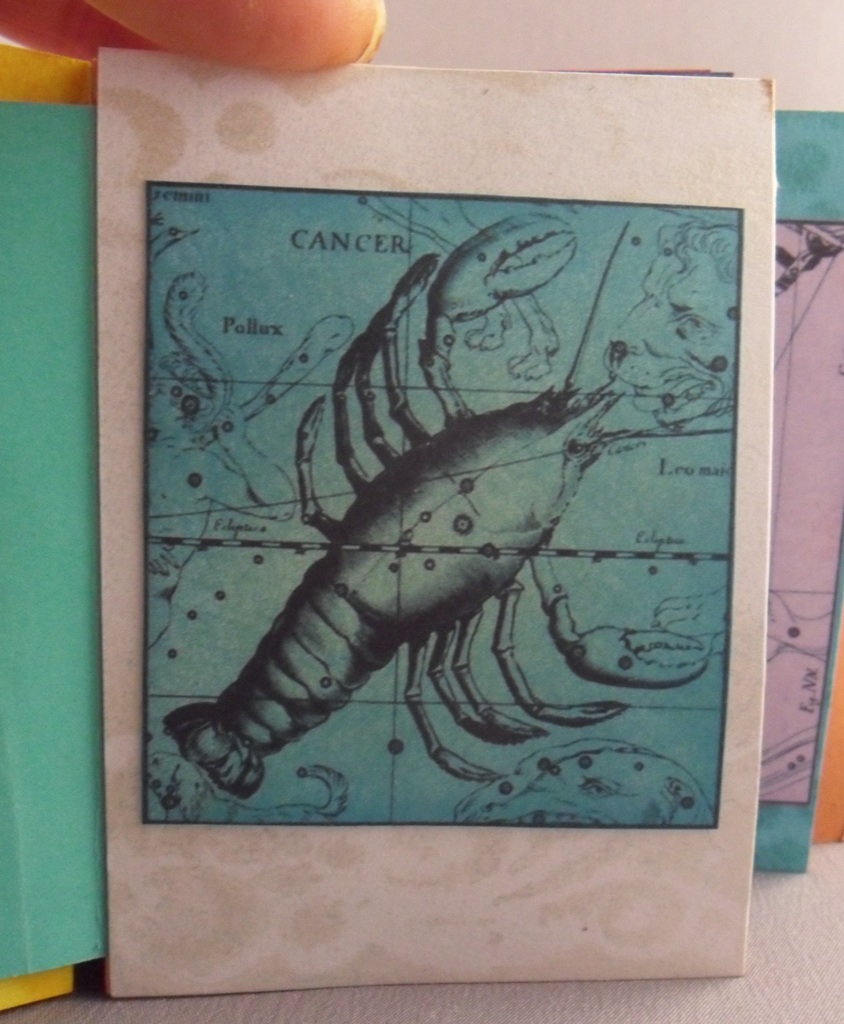
The colour card stock for each image was taken from the list
The colours used to colour the images - all done with distress inks - match that of the birthstones for each sign.
The set of images is a new one from Smeared Ink - Zodiac 1 Digi set and Zodiac 2 Digi set.
Aries - Ruby
Taurus - Golden Topaz
Gemini - Citrine
Cancer - Aquamarine
Leo - Garnet
Virgo - Emerald
Libra - Peridot
Scorpio - Alexandrite
Sagittarius - Garnet
Capricorn - Green Tourmaline

Aquarius - Sapphire
Pisces - Amethyst
The central hinge that keeps it all together is just concertinaed card stock stuck to the inside and the ATCs attached.
The mask used is from a prima set I have.

You still here? I did warn you of a long post.
One last pic. The back of each ATC has the attributes of each sign printed out and attached after more masking and colouring.
Now. Your turn to show us you can leave those embellishments in the drawer and wow us with those CAS designs.
You have TWO WHOLE WEEKS to link those projects up.
Some of the other minions have been busy too, show some love and go see what they have cooked up. If you need more inspiration - you'll have to wait until next Monday for the remaining dungeon dwellers to show off their projects.

This would also qualify for the Smudgy Antics challenge - make it colourful without markers or pencils. There's a few more days on that challenge for thos of you that want to join in there

I would like to enter this into the challenge over at
Hotshot Crafts - Anything but a card