Thursday, 25 October 2018

October "A Inky Mess"

Good morning everyone
It's the 25th and that means a new challenge over at "A Inky Mess" challenge blog.
This month we have the wonderful Gecko Galz sponsoring us so you know their prize is going to be fabulous.
For my DT inspiration I have used another substrate from Tando Creative. Not as mini as last month to be sure but this file holder is still only 13cm square.
I started of by using modelling paste through a stencil then painting it. (Decoart paints/mediums)


This is the file holder when closed

and open to show that the decoration carries on to the end
if you look very closely under the rice paper, to the left of that daisy, you might see the magnet that forms the closure on this. 

and the spine

I have used lots of bits and pieces from stash, ranging from some TH ephemera (inked round everything), some glass flat backs, some pearls from a cheap piece of costume jewellery and some micro beads. The gaudy green stone has some twine wrapped round to act as a means of opening the book without damaging the whole thing.
The stamped saying is from Sheena Douglass' butterfly collection, stamped on more rice paper.

It was so much fun making this, even though it's outside that zone of comfort which we all have. I think it does everyone good to explore other areas once in a while and I know it helps my mojo return after it has a little holiday.

Looking forward to seeing everyone's makes in this new challenge 

Wednesday, 24 October 2018

And Now For Something Completely Different

I have always embraced the theory that crafters need to venture outside that little comfort zone, they create for themselves, once in a while. It helps to expand and grow and, for me, helps to encourage Mr Mojo back where he belongs. This is why, when Katy Leitch from Mixed Up Creative advertised a little Shabby Chic tutorial using a kit available from Artful Days, I jumped right in with both feet. Trepidation can come later.  I really enjoyed the series of videos that Katy made and made my own version of the hanging (of course) but did use many of the techniques, some old and some new.
This is what escaped my craft desk to hang on my wall
To be honest, I have had "a few bits" of similar ephemera in my stash for eons and never really known what to do with them and loathe to throw them away (as most crafters will identify with). I think I will now bring them out of cold storage and start using them.


I Haven't Been Idle

I know that not many projects have made it to my blog in the last few weeks - that's because most of them were gifts and swaps with other crafters and I didn't want to show them publicly until they had been received. Well most have now made their destinations so I feel happy about displaying on my blog.

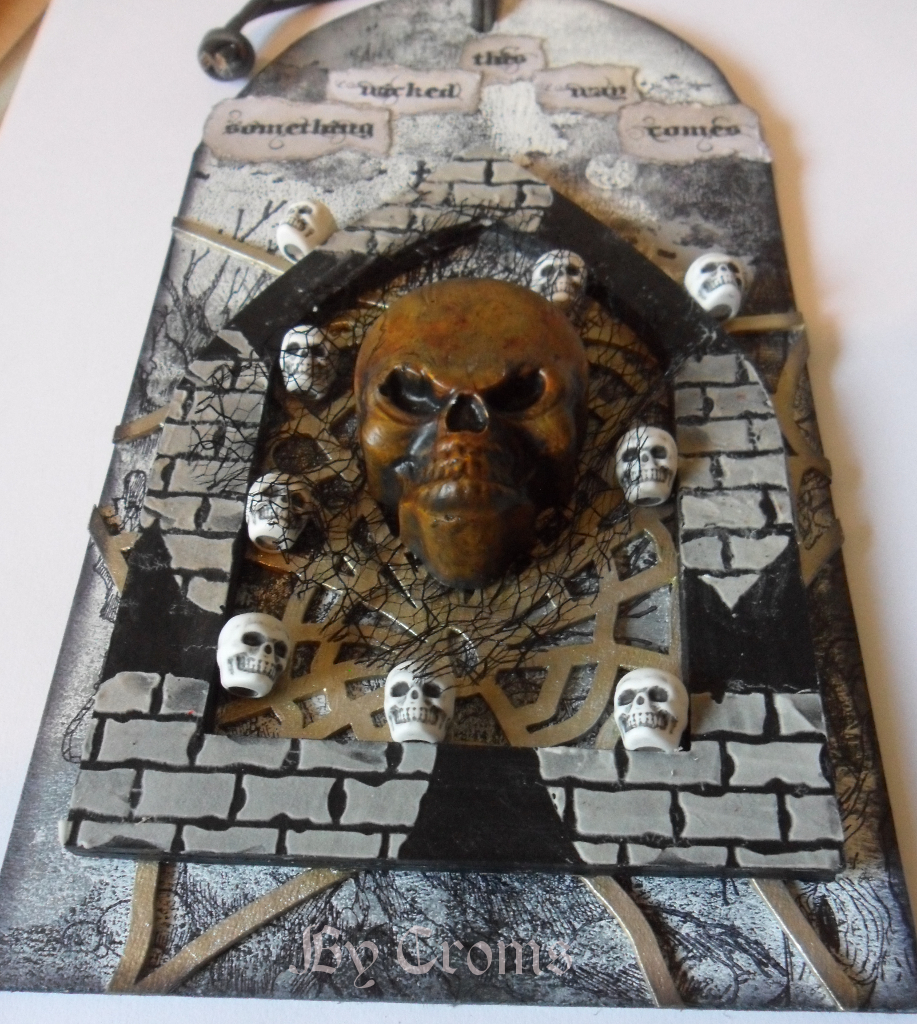
First up is a tag I made as a swap within a group on facebook called Mixed Up Mixer. A mixed media tag with a Halloween theme.
This was the one I made

A greyboard substrate with paint and inked images layered with more (Tando Creative) greyboard cut into an arch and one of Tando's spider webs and (Tando Creative) brick stencil with (Decoart) modelling paste. Some cobweb fabric under a painted plaster cast skull. A few plastic skull beads to finish

I think the dimension is better appreciated here

My second Halloween themed project is now safely in it's new home
This time a little hanging


The skull was painted at the same time as the previous one, so is a similar colour. This time the greyboard substrate was brayered with paint, colours ranging from dark grey through to white. Then stamped with archival ink using stamps from Andy Skinner, high lighted with white gel pen.  The ornate die cut is one from Tonic's mixed media range cut from greyboard. Painted black then a variety of interference paint colours. Layered with another cut from the same Tonic range again brayered with paint then script stamped. The cobweb diecut to give another element in my scene.
Finished off with some white artstones and some twine to hang the picture with.   

Thanks for looking

  
I'd like to enter the projects as one into the challenge at

Bleeding Art Challenges - Halloween Mixed Media

Tuesday, 25 September 2018

A Mini Mini Book

Good Morning everyone.
No, I haven't mistyped my heading. This truly is a Mini, mini book, measuring just 6cm square with a 2cm spine. It is my project this month for A Inky Mess as part of their design team that I have been lucky to be chosen to join.

This month we are being sponsored by Luna Girl, a treasure trove of digital vintage ephemera.
I have used "Bring your Wings" and vintage postcards 2 to make this little project.

The substrate is part of the mini book kit from Tando Creative together with a couple of small butterflies and Textures 1 from their thins range. Some decoart modelling paste on the diamond shapes, some small pieces of builders mesh between the butterflies then some decoart paints to colourise the front.  Some art stones adhered with heavy gel medium for a bit more texture. 


The Luna Girl images were adhered back and inside


with the book pages being a mixture of DP and the postcard images, attached with book binding glue to the ribbon covered spine.


A couple of brass charms completed the look. 


Please don't forget to take a look at the gorgeous projects my teamies have made using the gorgeous imagery from Luna Girl then come back to the A Inky Mess blog to enter your project so that we may come visit you.


Saturday, 25 August 2018

"A Inky Mess" Tag

Good Morning everyone
I have had a few weeks away and locked myself out of my blog, after all these years, now I can get this post up that I thought was prescheduled, I feel such a dafty.

I am here today with my first project, a tag, as a member of the "A Inky Mess" Design Team.

A fairly simple tag but with lots of layers.
The bottom part was started with some modelling paste through a France Papillon stencil (Rock Formation). When dry, a coat of paint to colour then a wash to bring out the texture. Then a piece of old book paper, again colourised with a wash of paint. Texture paste on the next layer with more paint both neat and as a wash before stamping with archival ink.  The picture frame was given a simple rusty effect with yet more paint then adhered to the picture base that was stamped onto a crackled substrate. A little word over a cambric layer under this. Some rusted wire shaped to form the means of "hanging" the picture with a tiny heart to hang from.

All stamps are from a range designed by France Papillon and made by Chocolate Baroque.
All paints and medium are by Decoart.

Thursday, 7 June 2018

Frangifantastic

Morning all

"What a strange title!" do I hear you say? Well it's one of the words on the stamp set "Perfect Words" by France Papillon for Illusionary artists produced by Chocolate Baroque. It so seemed to fit this tag.

The tag itself was started as a challenge to myself - after seeing the challenge set by the Mixed up Magazine blog design team. Bold colour!! Now for those that know me - this isn't something that comes naturally. I prefer to keep to the muted tones of black and brown. Getting out of your comfort zone once in a while has to be good to expand the creativity of anyone. So with this in mind - I started on this tag.

The tag itself is from the "Tagtastic1" and an element from "Flaming hearts" - both produced by Tando Creative.

The heart shape first because I knew I needed curing time. the main heart shape painted red, then crackle paint and then yellow. The heart frame attached and Decoart ultra thick poured into the hole. Leave alone and don't touch. More on this later.

The main tag
A layer of white gesso. The neat greyboard can be painted on directly but would have reduced the brightness of the colours. The using a soft gel medium to increase flow time more and Decoart media fluids I mixed with up a storm on the tag.
Patience - let it dry.

Stenciling and doodling
adding the stamped word matted onto some sheer orange fabric


There's a smaller tag here to mount the heart onto. The flames are orange and coated with a crackle medium 


The wings are made using hot wax into an Artyco Crafts mould. Coated with perfect pearls before Decoart gold interference paint.

Outside of my comfort zone - for sure. Do I like it? Yes I do. Will I come back into this zone again? - for sure - just don't ask when.


I'd like to enter this tag into the challenge at
Make It Mixed Media challenge - Bold Colour


Tuesday, 5 June 2018

AIW Mini book

Morning all.
I hope you're all enjoying the unseasonable sunshine, I know I am.

Today I'd like to share a little mini album I made for a swap, held in a facebook group I'm part of . The brief for the swap was "no more than 6 inches" but can be any project you can dream up. Tag, ATC, Card, Altered item, Book ..... anything. Well this little book measures 6" x about 4" but it is also quite deep. The recipient has received it now, so I can share.

Many pictures follow so I hope you'll bear with me.
The papers are all from Vectoria Designs from their Alice in Wonderland collection. Other bits and bobs from stash. The bookplate on the spine is from Tando Creative.

Front

Back

Spine

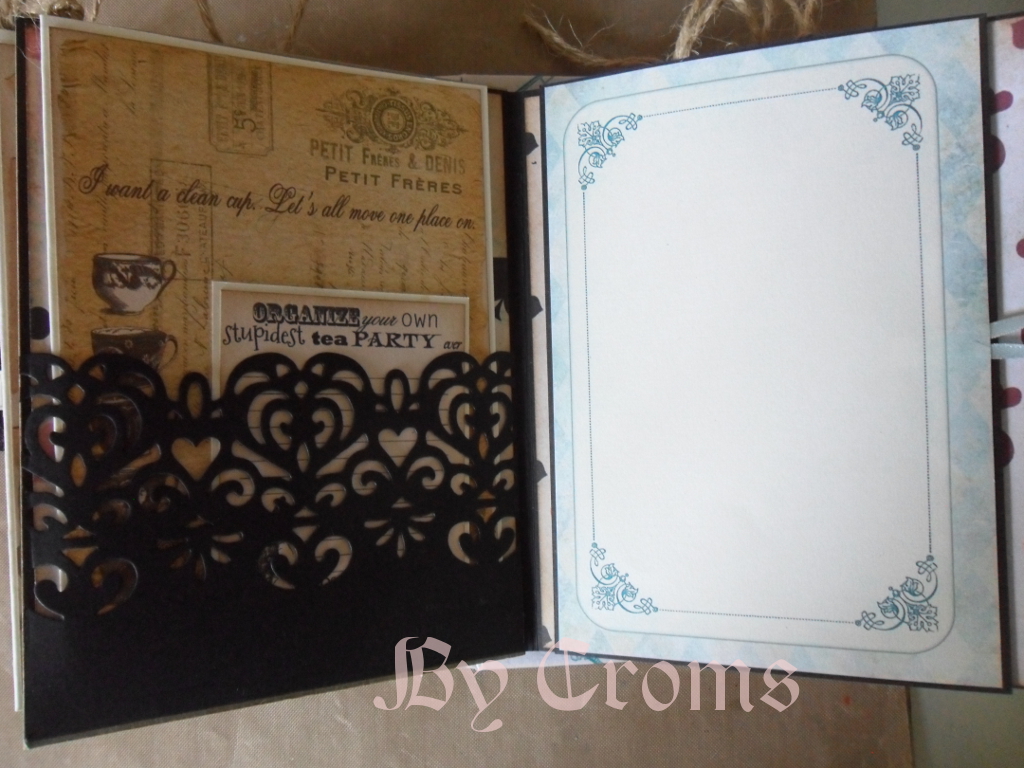
inside cover with page one
you can also see the string on each of the inserts between the main pages for private journaling. this is possible because the base of each page is card folded to form a double open ended sheet. One end is adhered to the spine page holders leaving the other end open.

inside front cover with a concertina file with ribbon/buckle closure

opening page one

opening page one totally to show more tag space

pages two and three. both tri fold pages with tags
following four photos show the pockets and tags and journaling space inside these two pages


all the openings on pages two and three

pages four and five

page four - a double pocket page with tags


page five opened with belly band for more tags etc. this has a magnetic closure

 page six and inside back cover

page six - a waterfall with magnetic closure

tuck pocket under the waterfall
 
 tag inside the back cover pocket

A lot of pictures I know but I am unable to do a video of it so this has to make do.
Thank you for staying with me through this journey


I'd like to submit this mini into the following challenge

the Mini Album Makers challenge