Sunday 30 June 2013

Along Came a Spider

Hi folks
I was asked to be GDT for the new challenge blog, Musically Challenged.
It's run by Kapree, a fellow DT member at Smeared and Smudged but it is in my capacity of EDT for Rick St Dennis that I am guesting this fortnight on her challenge blog. Rick is sponsoring the challenge this fortnight and the theme is that of the awesome Alice Cooper's "Along came a Spider".
(The link to the 10 minute video on youtube if you're interested)

So, enough of the ramblings,
My GDT piece for the challenge uses two of Rick's images. The fabulous nurse as inspired by the film Silent Hill and the Undertaker. Doesn't he have just the right Alice Cooper look to him? I thought so. Both images coloured with promarkers.
A page for a journal I am gradually adding to.

There are elements from Jems Designs, Southfield Paper Shop is the supplier of that fabby BP, the MS spider web punch was used on pearlescent silver paper for a more webby look.  The words written on the three scroll pieces "you trap, you kill, you eat" are taken from the soundtrack of the video/album. The pre-flocked and diecut "film" pieces are from a RAK from a couple of years ago.
The spider - well what person doesn't have a few in their stash hehehe.

There's a few more days left to enter the challenge so get on over and check it out.

Thanks Kapree for the GDT honour at Musically Challenged and I thoroughly enjoyed this.

I'd like to enter this page into the challenge at
Sweet Stampin' Challenge - Not Cute
Left of Centre - Use a sentiment/LOC

Tuesday 25 June 2013

Design Team Throwdown for June

Yep, it's come around yet again. The theme for this month's Design Team Throw Down is

Danse Macabre

as chosen by last month's winners Airless Chambers for Rick St Dennis. I just happen to have been wearing the hat for that team last month and thank everyone for voting our projects as favourites.

This month I am wearing the Smeared Ink/Smeared and Smudged hat. An exciting life I lead, eh?

It just so happens that Smeared Ink have a stamp set called Danse Macabre and this set had to, in my opinion, get incorporated somewhere. There is also a couple of images of dead dancers and one of these images also figured in my thoughts as I tried to decide what to make. My thoughts turned to that period in time when the great plague swept through Europe as I also had thoughts of using the Venetian Masks. Strange and scary the way my mind works sometimes. Maybe it's because I was also thinking of Poe's "The Masque of the Red Death" having just read Dan Brown's "Inferno"? Maybe I'd heard the children singing "Ring a Ring o' Roses" when playing outside? Popular belief points to this nursery rhyme being about the plague although it seems this thinking is wrong, according to various sources available on the 'net.

So what did my very tired brain cell come up with? Something that turned out to be a bit more fiddly in execution than when originally thought of. It's those little things that I think of whilst making things that seem like a good idea at the time.
This post is picture heavy - you have been warned!
First - the whole thing moves and taking pictures proved to be a task in itself.

Not all the images can be seen in just one picture but you can get a good idea of what I can see.
Each of the images were printed twice. One "set" being flipped so that the image can be seen on both sides. All the images were coloured using promarkers before fussy cutting out.
The Danse Macabre skeletons were all laminated then a panel containing them cut out using a die cutter.
The Venice Masks have black feathers adorning them, sandwiched between the layers. Linking the images there are little rings of seed beads threaded onto clear jewellery thread. These represent the "ring of rosy" - the sign that the unfortunate person was infected with the disease, according to popular belief. 


 I resorted to putting some white card behind each set of images to take a photo.
The Dead Dancer features centre stage

She in suspended, using more of that jewellery thread, under a simple cross form made from black cane that is growing in our garden. This was decorated with small posies of flowers as per the nursery rhyme. 

this, in turn, was suspended using red jewellery wire.
That's about it from me.

I would just like to say that it has been an honour to represent Smeared and Smudged/Smeared Ink this month and I know that my teamies will have awesome projects for you all to admire. The other teams as well will have made some amazing artwork and I'm sure the competition is going to be stiff. Again.
We now need YOUR votes in the forum to say which team has produced your favourite projects.


Monday 24 June 2013

A Special Card

A friend of mine was to wed her dream man therefore a card needed to be made. This is that card.
Visible Image stamps came to the rescue here. The words on this stamp are just so beautiful. The clean lines I have given the card are for Karen and Drew, Karen's style of crafting is clean cut and the grungy finish of the stamp fits my style of crafting,
The stamp here is called Hearts Entwined. Stamped in blue onto a heart shape die cut and ink distressed with DI.
The back ground cuts are made using my cricut. Three of the frames from the "Frame of Mind" cart.
The colours chosen as these, I knew, were part of the colour scheme, ivory and blue.
The sparkle - well that again ties in with the occasion and there's always going to be bling where Karen is. The flowers are a beautiful royal blue from stash.
A bit showing the corner detail better.
 
Inside is another Visible Image stamp, Fairy Tale Ending. I'm afraid I shook a bit here and the stamp didn't stamp as well as it normally does. That's my fault not the stamps. I was in a rush to get it finished. This is 10 mins before it was to begin it's journey to the happy couple

We all have our mis-stamps, don't we?
Both these stamps are available from that fabulous bricks and mortar and online shop - That Craft Place 


I'd like to enter this card into the challenge at
That Craft Place - Flowers

Drip Drip Drip with Smudgy Antics

Blogger and I had better stay friends today as this is not the last post I have to make.
This time we're with Smudgy Antics and the continuing challenge there of
Dripping
I often ask my son for ideas when faced with a subject theme. He has a similar warped brain to mine. A true mother's son. His idea though was not taken up. He immediately thought of food and the dripping one gets from roasting meat. OK I had to think on this one myself.

The other members of the DT have come up with such imaginative ideas, I felt a bit overwhelmed. I played safe and went with paint. That medium lends itself so well to drips. I also wanted to play with my gelli plate that has been neglected for too long.
My background sheet

some green and blue paints then off white into which I stamped into with the bark rubber stamp from the Urban Decay set available as a member of the Smeared Ink rubber club. Some bright green acrylic pain then made into a wash and splattered on an the paper tilted so that it ran.
Next up came one of the images from a past rubber set called "Prints". These are still available if you want to sign up. There are so many awesome stamp sets available.
The sheet with image attached to an ATC with a little strip of paper punched using my "drippy goo" punch.
I didn't stop there however.
I wanted a sentiment but didn't want to hide any of this pic. I was also asked to do a tutorial on an ATC I made last week. I used this ATC as the subject of that tutorial.
So another slider ATC was begun.
More images from the "Prints" rubber set.
and the Urban Decay set for the base
All put together

The words - well they are letters, stamped individually onto the bottom slider that had previously been stamped with the same bark stamp as on the gelli plate topper.

The tutorial will be with you sometime this week, with all kinds of luck.

Thank you for reading my ramblings and I'll be back later with some more news from the Cubbyhole.
Don't forget to come on over to Smudgy Antics and drip with us this week.

I'd like to enter this ATC into the challenge at
Anything BUT a card - Get Messy

Stitch It - with Delicious Doodles

I know, I know, this is late. Firstly I couldn't get my pics to upload to blogger on Thursday or Friday for some unknown reason. I've been having problems all weekend uploading any pics - even by email. Then it all starts working again, go figure. Anyway... better late than never?
The first of many posts (hopefully) today is the post that I had hoped to get done on Friday. That was the date the challenge over at Delicious Doodles went live.

The challenge this week is all about getting you all stitched up.


I have used one of the older images that are available in the shop, but one that I think deserves to be highlighted now and again. For all those rugby enthusiasts out there it is ideal. This is Rugby Silhouette.

I used papers from the Southfield Paper shop, fairly local to me. Layering up with nesties in reverse so that the image is on the bottom and framed. Then blanket stitched (by hand) all round it. The other stitching is faux. Just a thin nibbed brown pen and a ruler to give the impression of stitches.
The LO of the card is thanks to the inspiration of the sketch by Pals Paper Arts.
The sentiment is stamped in brown using various words from Visible Image Stamps.

Again apologies for the lateness of the post but sometimes blogger is here to test our patience as I'm sure most of you have experienced.

I'd like to enter this into the challenge over at Pals Paper Arts as it is inspired by their sketch.


Wednesday 19 June 2013

another ATC for fun

I have been trying to work out a way to depict a theme for an up and coming DT piece. I'm not saying what yet of course, but in the course of experimenting I have done another ATC. This time the style is an adaptation of the magic card as shown in Splitcoast Stampers.
It just so happens that one of my fellow Minions in the Haunted Design House Dungeons, Mark, is a member of the talented DT over at Fun with ATCs, and I thought I'd come an show some support. The subject/theme of the ATC this week is "FLOWERS"
My ATC is made using one of the flower stamps from the Smeared Ink (discontinued) rubber set but the digi format can be obtained HERE. (Any small image can be used of course for this method, I  just went with the theme.)
My ATC
Black and yellow glossy card can be seen better below. (The ruler to prove the size.)

That little tab bit...... well that's how the magic is played out


I added some little gems in the shape of flowers as well, just for fun.
The flowery die cut added for contrast.

I'd like to enter this into the challenge at
Fun with ATC's - flowers

Monday 17 June 2013

Happy Fathers' Day

When Rick St Dennis kindly gave away an image on his blog,during the last Skull Appreciation Day blog hop, I just had to use it for the Fathers' Day card I was planning for my hubby. Anyone that knows hubs will be able to see the resemblance in a caricature way. Even the hair! Favourite colours to be used - those of his favourite footie team, Hearts - maroon and light grey.
 Easy to colour, I used my promarkers here. Then cut out using a spellbinders die with a glitter card mat. My little joke with him. Edge distressed the image panel with DI.

The "Happy Father's day panel - cut from a pre-printed sheet of sentiments from Southfield Paper Shop in Edinburgh and edged with more sparkle in the form of red stickles. I threaded some bakers twine through and "hung it" using a single card candi. Coloured to match with my promarker.
The red paper is from a Christmas collection of unknown origin matted onto pearlised silver card. The rosette was made from the same silver with a button from stash. 
A jokey card for a jokey man, whom I love. 
Apparently he's going to "get me back" but he still loved it.

I would like to enter this card into the challenge at 
Just Inspirational -  Inspirational pic - "Daddy Cool"
A Gem of a Challenge - Fathers' Day

Holey Moley at Haunted Design House

Morning peeps
It's the second week of the challenge over at Haunted Design House where the challenge is all about the holes. We want to see more than just one hole in those projects. Being one of the "alternative" challenge blogs, this means no cute stuff. Hallowe'en, Gothic, Steampunk, Horror etc are our preferred project genres.

What did I make as part of the second wave of Minions' makes and to remind you all that there is now only one week left? An ATC. I love these little works of art. So much can be done on a 2.5x3.5" substrate.

The majority of the holes in my ATC can be found on the bird. Want to see?
The base of the ATC was first stamped with a clock background stamp from Creative expressions in "wild honey" distress ink onto a cream ATC blank. The bird is part of a set from Kaisercraft. Stamped onto the ATC then a film of glossy accents to form the glue for many little watch parts with more glossy accents to make sure they all stayed put. The placing of the bird was essential, as you'll see in a minute.

A birdcage, again kaisercraft was stamped onto acetate. This was to form the sleeve of the ATC.

Now for the tricky part
I wanted the bird to be able to "sit" on top of the cage as well as be inside as well.
A slider mechanism was needed.
I used the method for a slider card as per Splitcoast stampers as the basis of my popup ATC. A few adjustments were needed, not just on size. The front of the ATC needed to be visible at all times. The slider mechanism therefore needed to be open and not enclosed.
I'll get a little tutorial worked out sometime soon for those that are interested.
We're nearly done.
The other sliding piece of this ATC was stamped with a cage with birds and sentiment from a Paper Artsy set.


The inside slider has a hole made at the bottom with a piece of ribbon threaded through and the acetate sleeve and the back layer of the five card insert are held together by another piece of ribbon.
The bird can now be caged or set free at will.

Your turn
Can you bring yourself to making holes in your project or use something with holes as I have. The other Minions and I would love to come over and see what you create. Come and show us by linking up to the challenge at Haunted Design House.

I'd like to enter my ATC into the challenge at
Wicked Wednesday ATC challenge - Birds, nests and eggs
PunkyouGirl - Anything Goes

Saturday 15 June 2013

GDT at Crafty Friends

Morning all. Anyone else contemplating putting the heating back on? It's definitely not warm here, we even had sleet last night! In the middle of June!?!? I only hope the weather improves for next weekend as it is the wedding of two dear friends of mine. We have seven more days, so there is a chance.

Onto today's post. Another card. This time as GDT for Crafty Friends Challenge blog. The third challenge after a little re-vamp.
Favourite colour combination. 

I have a few that I use but I think red and black/grey has to be on top of the list therefore those are the colours I went for here. Rick St Dennis is sponsoring the challenge this week and I chose to use the image Les Miz. I tried to show the spirit of the musical/play - I had to resort to youtube as I haven't seen it myself although the future recipient has and has declared it as one of her favourites.
Isn't she a beauty!
Coloured with Promarkers before cutting out with a "die-sire" die. Some red and black gems and roses added after attaching to one of the mats.
Some embossed and sanded, red cored, black core-dinations matted onto red glitter card. The two mat panels of DP are from the DCWV "The Immortal Love" paper stack. Red distress ink applied after distressing the panels. The sentiments are computer generated and matted onto more red glitter card after slight decoration with a "die'sire" edge cutting die.

The only trouble I have with red is taking a good picture, even with good lighting, the colours get distorted slightly.
The regular DT over at Crafty Friends have made some absolutely stunning projects as well and are really well worth a good look. In addition, there's a little extra there. but you'll have to visit to find out what it is. hehehe.

I'd like to enter this card into the challenges at
Left of Centre - Embossing/ LOC
Digi Haven - Anything Goes

Wednesday 12 June 2013

GDT Spot at Quirky Crafts

Ooops my blog should have been updated the other day, but one thing and another......
Anyway............
Following an entry into the challenge over at Quirky Crafts Challenge blog the other week, I was asked to be GDT this week. The regular DT have made some spectacular projects and are screaming out to be admired, so please go look.
The challenge was to make a project with more than one fold. There were images supplied by The Cutting Cafe and I chose the Ahoy Matey collection to work with. It was an ideal set to use for my grandson's upcoming birthday next month. So a card was born...
More than one fold.....a box card that stands up on it's own using the dimension of the box when popped open but can be sent through the post in an ordinary envelope.
The images were manipulated by me on the pc to create the pic at the back and the ship coloured with promarkers before masking off and stamping a load of skull images to add more interest and break up the sea of white. The DP used is from "My minds' Eye" halloween papers of last year. The "Ahoy Matey" disc on the front is also from the image collection. Just cut out with dies, matted up and fixed on.
A simple card for a seven year old.
Thanks girls for asking me to join in at Quirky Crafts

Sunday 9 June 2013

Smilin' Joe Skull

Just for fun, in amongst all the b'day cards, fathers' day card, wedding card. All for celebrations this month.
I made an ATC. I finally coincided with the ATC challenge over at Wicked Wednesday ATC Challenge Blog. The theme over there this week is
Headstones and Graveyards 
and they have an awesome sponsor as well - Smeared Ink.
Well, having so many stamps that fit in with this theme - I had to have a play. Didn't I?

I used one of the stamps from The Holy City set from Smeared Ink as my background stamp. (This is now available only in rubber. Follow my link to see more info on joining the club to get yours.) Added a bit of colour with promarkers.
The gravestone is a die cut with some of the embossed bits picked out with gel pen.
The fabulous skully image is Smilin Joe Skull with Roses and is just one of the new range of skull images from Rick St Dennis. I have featured in the recent past other fabulous skully images from the pen of our Rick that are now only available from Smeared Ink Rubber club. So even more reason to click on these links.

I digress
My ATC
I added some tiny white rose buds to the mix as well after a touch of caramel promarker to the edges. Well, when white roses are "past their best" they do start going brown. The text is from an Indigo Blu rubber sentiments collection. I just cut it up a bit to fit on the grave stone.

I would like to enter my ATC into the challenge at
Wicked Wednesday ATCs - Headstones and Graveyards
Left of Centre - Anything LOC

Saturday 8 June 2013

Gone all Flowery with Delicious Doodles

Ooops my bad. I forgot to get this post organised and posted yesterday. Mind you my son and daughter have been hogging the pc for a while. No real excuse I know because I could have booted them but job hunting for them comes first.

A few hours respite and my pc back under my guidance and I can get on with updating my blog.

Delicious Doodles challenge kicked off the weekend yesterday as usual for a Friday. Team A's turn to make a project to (hopefully) inspire others.
The theme this week is Flower Frames

and a beautiful FREEBIE is supplied
Teri has so many beautiful flowers on/in frames in the Pansy and Butterfly Frame.

A gift box instead of an ordinary card, so many birthdays coming up and so many cards already made, I needed something to put the little gifts into.


All made from an A3 sheet of card.
The image, coloured with promarkers, was adhered to the front with the butterfly cut out again and decoupaged up slightly. Some gems, ribbon and flowers. I hope the recipient enjoys the contents as well.

The other girls on the team have gone all out with their gorgeous inspirational pieces.
Now it's your turn to inspire us. Just come along to the challenge blog and link in your flowery framed projects. Don't forget that fabulous freebie!!!

I'd like to enter this into the challenge at
C.R.A.F.T. challenges - Anything but a card

Tuesday 4 June 2013

2013 Skull-a-bration Day

I can hardly believe a whole year has passed since the massive bloghop of 2012 celebrating the beauty of the cranium. This little (???) party has been organised by the gals over at Smeared Ink/Smeared & Smudged forum and is only a small part of the world wide tribute to that bony shell that contains our brain. For more info on the world wide event, the Skull-A-Day Blog and for the Smeared & Smudged participation, follow the links.

If you are following the hop order then you will have arrived, and still be reeling, from the amazing Bombshell Girls creations. If you have arrived here just on the off chance, then may I suggest that you start up at Terra's blog and see the whole wonderful array from start to finish? If you're just lost - well the whole blog hop order is there on the left hand side bar of my blog.

I have two projects to show today.
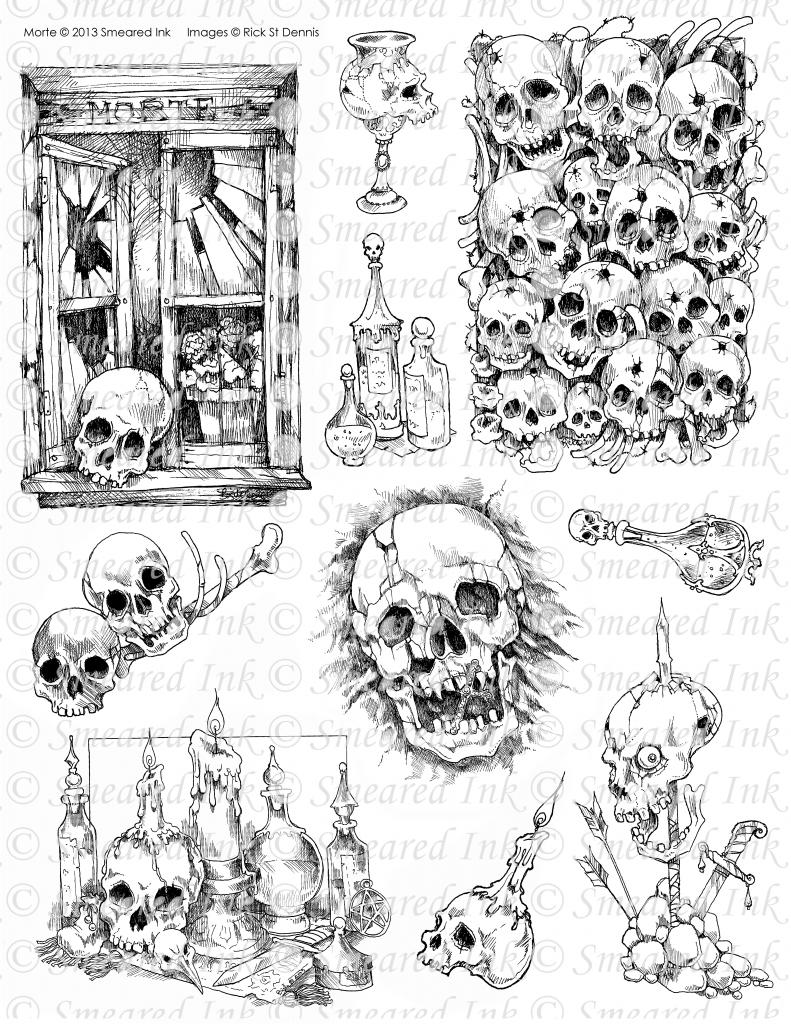
The first features just one of the images that are to be only available through the Smeared Ink Rubber Club for June. This project was created using a digital version. As a member of the DT, I was lucky enough to be able to use this as a preview. The set is called MORTE and created using the fabulous artistry of Rick St Dennis who has now joined the Smeared Ink's awesome collection of artists. You really need to check this collection out!!
If you are a lover of Rick's fabulous work and can't wait for the rubber set then why not head on over to his Etsy shop and have a look at the selection of Skull images there.

An altered cigar box.


different aspects here of the entire box, showing the dimension of the decoupaged front and the stencilled sides and back (Andy Skinner). The image was coloured with promarkers on both top and front. Because of the limitations of the light available here in Scotland, I scanned the image before attaching to give a better idea of the colour. That's distress ink you see colouring the white card base.

The paper covering and lining the box was purchased from Crafty Chaos, who sadly are no longer trading. The "wrought iron" on the corners are from a Sheena Douglas set of rubber stamps.

The second project is an altered key cabinet


This is lined with papers from the same Crafty Chaos papers. The whole box was washed with acrylic paint before the addition of gold metallic rubbing wax on the edges. Various rubber stamped images from Smeared Ink's Quoth The Raven, Lost Coast and Tim Holtz were then adhered. The side edges covered with a copper coloured ribbon and punched paper using MS drippy goo. The hooks that came with this salvaged piece need to be replaced. The white plastic covered ones really do not "go".

Thank you all for taking the time to visit my little corner of bloggy world and hope you enjoy the rest of the amazing projects. Again, if you get lost, the left hand side bar here contains all the blog addresses of the other artists that have dedicated their time and join with me in this Skull-a-bration blog hop.

Both my projects fit the bill of the challenge at Craft My Life - a re-launch of the challenge blog where anything but a card is the norm
They also fit the challenge at Created with Love - Anything Goes. Who doesn't just love their noggin?
The challenge over at Simon Says Stamp is to use the letter S in projects, well I have loads of SKULLS here so would like to enter into this challenge as well.
The Hobby House challenges have an Anything Goes challenge this month as their first ever challenge

Monday 3 June 2013

Hangman

It's the second week of the challenge over at Haunted Design House. The challenge that requests that you use knots or a noose somewhere in your project.
I felt I had to have a real hard double think when I saw the image I was going to use being used by another of the minions and so wonderfully. I then remembered a Graphic 45 rubber set I have in my collection. Rummage, rummage yayyyy.
An ATC as I was still putting together one of my projects for tomorrow's massive Skull-a-bration bloghop. More of that later.....

My ATC

The ladies are that stamp I was searching for. Then there is the bird and tree branch from the De Stempelwinkel Dark Boundaries set and after masking off the ladies a TH compilation ATC stamp.The words were computer generated and stuck on. The noose.... well I couldn't find my string so had to raid the shed and this is the only twine I could find. I will, no doubt, change the green for another colour. This'll have to do for now.
Your turn to get those knots brushed up on and come show us your knotty work over at Haunted Design House.


Texture with Smudgy Antics

Today marks the start of the next two week challenge over at Smudgy Antics. This challenge is all about

TEXTURE

We would like to see those textural pieces that everyone loves to touch and feel. As well as look at. We would prefer the non-cute of course..... this is Smudgy Antics after all. There are so many main stream blogs that cater for the cute and we like to be different.

I made a canvas. It is 8"square and was able to pick up a few for very few pennies the other day, lucky me.
All bedecked in green and gold with a touch of brown and purple.
The main image and text are from the Smeared Ink Nymphs Set. They are available in digi here although this is from the rubber set that I am lucky to own. The bg to the tree Nymph is the bark stamp from the Urban Decay rubber stamp set that was featured last month in the rubber club. Still some available just make enquiries here at the Smeared Ink website.
The canvas was first covered with a thin layer of gesso and the stamped image of the bark on paper was added. I did try to get the image to stamp the texture on the canvas but with no luck. I did however get the fabby stippled effect. The whole canvas was then washed with layers of decoart blue/green, gold and transparent yellow acrylic paints. The "butterflies" are created using grunge paste and an Andy Skinner mask. Plenty of old gold rubbing wax all over before attaching our gal and the embellishments. Some twisted wire for the antenna under some pearls, all held together with sepia accents. Some die cut leaves and some golden skeleton leaves. Then comes our leading lady, stamped onto cream card and coloured with promarkers.

I hope you all have a chance to come and show us your TEXTURE over at Smudgy Antics and visit the other DT blogs that make up the Smeared Ink DT team.

It's Skull-a-bration day tomorrow and there is a massive blog hop scheduled. The list is over on my LHS side bar. Loads of skully gorgeousness and inspiration, as if you need it. Please come and support us that love our craniums.