Showing posts with label RickStDennis. Show all posts

Saturday, 5 December 2015

Progressive Challenge December with RSD

Good morning,
A bit late and I apologise, but only just been able to sign into blogger again.
Rick's Sparkle & Glitter blog is holding yet another progressive challenge and this is part two. The part when a project using the image supplied has to be used. This moth it's a little animated prezzie who really can't make up his mind whether it's Christmas yet or if he's still to be in Hallowe'en mode. His name is Take Yer Pick and, if you didn't get him free by entering the first part, he can be purchased from the Zibbet store.
I decided to put him on a tag
Some torn Christmas papers top and bottom and hallowe'en paper sandwiched in the middle.
The sentiment stamps are from a variety of companies. "Happy Halloween" is from Artistic Outpost "Haunted Halloween and the "Merry Christmas" and "Seasons Greetings" were freebies in a couple of mags. Some of the trees were glittered up. The black/silver twigs are a die cut. Edged with green ink and added ribbon from stash. 

Sunday, 1 November 2015

Progressive Challenge for November and RSD

Post #2 and still keeping in with the the darker side of crafting..............
This time it's for the Sparkle and Glitter Blog of Rick St Dennis and the first month of the Progressive Challenge............ Anything Goes with an RSD image.

Not much in the way of sparkle and glitter in my make for today though.......

.With Deathly Pallor on a canvas painted with Decoart paints and stencils

The difference between a photo and a scan and the way the light hits the object!!!
I really enjoyed colouring this image with my Caran D'ache pencils and decided to use a blending pencil instead of paper stumps. Some colours were easier to blend than others so still in the "trial and error stage" here


Now to try get my head in gear for a "Traditional Christmas" and a new baby coming to the family very soon.

See you soon


Friday, 9 October 2015

31 days of Halloween with Airless Chambers and RSD

It's that time again for Airless Chambers Crew to join in the creepiest bloghop of the year, the 31 days of Halloween. Organized by Smeared Ink. The AC crew will be using Rick's awesome Halloween digi and / or rubber collection. You can find the digi at his Etsy or Zibbet shop. Rubber only at I Brake For Stamps

Blogroll is in the side bar in Airless Chambers enjoy the hop, if you dare.

Hi everyone. Helen/Croms here with my project for the hop.

Using Willaworm WitchypooHester Hoopgarten and Busted Down Witch on a plywood base that has been sitting waiting for a coat of paint for a while.
Decoart paints/products were used on the base.
Getting a picture without glare - not easy, sorry. So a piccy with and without flash.


and a close up of the little bit of writing .. well I'm sure a lot of you have experienced those mornings after the night before and can relate to how "Busted Witch" looks and is probably feeling.
The background was created by stamping with purple paint onto the green base using one of the stamps that Smeared Ink sold designed by Rick... from the Morte set.


Tuesday, 1 September 2015

September Progressive Challenge with Rick St Dennis

September already!!??!!  Where's our summer?? Looks like we, in Scotland, lucked out again this year. There have been too many days in August that the heating had to be turned on it's been that cold. I just hope this doesn't herald an arctic winter. I guess we'll find out in due course.
In the meantime............
What have I been making in my crafty corner?
Well one of the projects was this wall hanging..............for the Progressive challenge over at the Sparkle and Glitter with Rick St Dennis blog


Using the image Ghost of Versailles.

The image was coloured with promarkers and graph-it markers before cutting out with additional mats of red and 2 different blacks. Plenty of vintage paper distress ink, some black lace and little red and black flowers teamed with some black pearl sprays and a couple of home made pins.
Glossy accents added to the "emeralds" completed the project.

Tuesday, 7 July 2015

Lost in Music

WOW has it been that long since I posted here?  I must admit I've been suffering from a serious lack of mojo in recent weeks and that is, no doubt, something the majority of you out there can identify with.  I did, however, get my finger out and put together this wooden desk tidy that was picked up at one of the craft fairs I was lucky to attend earlier this year. It's been sitting there, in a bag, waiting patiently for a few weeks. Finally it's voice was heard and I set to. needing to get it out on the desk.
It's a three box tidy, different sizes.  First the MDF needed to be sealed and a mixture of PVA glue and black paint achieved this. When this base coat was dry, each of the four sides were treated to a different design. I would then be able to ring the changes occasionally by turning them round in the base tray.
I apologise in advance about the picture quality - I lost my camera and needed to use that on my mobile phone.

The first side
Inspired by Pantera's "Cemetery Gates" and being my DT piece for Haunted Design House this month. "Lost in Music" - any project inspired by a piece of music.

 This is how all the sides, when assembled, fit together. For the post, the sides were photographed as I went along.

The music score BG is a stamp from Visible Image. Stamped using a silver pigment ink and dusted with silver pan pastel. Sealed with DecoArt Decoupage. The inchy stampbord panels were joined in sets of 4, coloured with distress inks before stamping with some inchy stamps from Inkadinkadoo. The little panels then edged with silver embossing powder before adhering to the sides with glossy accents.
The second side

These are decorated using the rubber versions of "Haunted Places 1" that were available from Smeared Ink and now available in digi format from the Zibbet shop of Rick St Dennis.
The third side
these sides have been stenciled firstly using silver DecoArt metallic paint. then the big skull from the skull sheet of Rick St Dennis was printed out a number of times in 3 different sizes. These were decoupaged  before dipping in UTEE.
The fourth side
Heat embossed using a stamp in my collection of unknown origin and silver embossing powder.

Friday, 15 May 2015

RSD Progressive challenge, part 2

A bit late posting this, sorry. It's on the right day at least. Getting ready to go on a small holiday and to visit a dear friend. I hope you'll forgive me my tardiness.

Any way,
The reminder post for the Rick St Dennis' Sparkle & Glitter Progressive Challenge went live today.
Some awesome makes from my fellow EDT. I know I'm on Team A and already posted my make but I couldn't resist a second bite at the cherry.
This time using Justine. She has been used to make a birthday card for the daughter of another friend of mine.
I couldn't resist colouring those locks in a "strange" colour, hence the deep pink. All using promarkers

And here she is mounted onto metallic jade and pearlised black card. Some die cuts and a punched border with a couple of gems and done. Sorry about the glare. Something about mica that the lights here don't like.
We'd love for you to come and join us in the fun with out Anything Goes with an RSD image.

Thanks for looking

Friday, 1 May 2015

Progressive Challenge with Rick St Dennis

Good morning peeps
I hope the weather where you are is treating you better than in my corner of the world. We have seen several seasons in an hour lately let alone 4 seasons in one day. Weather ranging from warm sunshine all the way through to snow, rain and hailstones, and you should have heard the thunderclap Wednesday night! Oh my, I thought the roof was going to cave in! We are still here though, hanging on.
Enough of my prattle and on with the main reason for this post.

The first of every month sees the start of another episode to the Progressive Challenge being held over on the Sparkle and Glitter blog of Rick St Dennis. May is the start of a new 2 month stint where Anything Goes, as long as it has a Rick St Dennis image from either of the Zibbet or Etsy stores.
As part of Team A it's our turn to host the first installment.
My project uses the images Jocasta and Jarrod
Both coloured with promarkers then scanned into my computer so that I could shrink down to the size I needed them. ie about 2.5 x 1.5 cm. No way could I colour them that small without a microscope.
Why so small? To fit onto a couple of travel dominoes measuring 3 x 1.5cm.

 The dominoes were first covered with scraps of DP from prima "The Archivist" pad. Then the images, after fussy cutting out, applied with a touch of glossy accents before covering all with a good coat of glossy accents. Set aside and leave to dry.
Whilst they were put aside I could concentrate on the base.
A wooden watch shape frome Indigo Blu. Painted first with Decoart Black paint front and back. Then for the back, a layer of  Decoart "weathered wood" then dazzling metallic in copper.

The front was covered in more of that paper from Prima and ink distressed with brushed corduroy.
Some metal charms and chain attached with more glossy accents and those altered dominoes secured with yet more of this amazing multi purpose medium. A couple of pearls added to the dominoes - just because!

The chain that was used can also double up as a means of hanging this small decoration.

Thanks for stopping by.
Looking forward to seeing your projects over on the Sparkle and Glitter blog.

I'd like to enter this little whimsy into the challenge at
Dream in Darkness - Anything goes (as long as it's not cute)
Create and Inspire - Anything Goes
Crafting From The Heart - Anything Goes

Tuesday, 21 April 2015

An "Irish" box card

Hi everyone.
This is a card that I put together ..... then realised it openes up "the wrong way". Oh well.... good for a left handed friend,  hahaha.
I used an image called Carmen from Rick St Dennis.
Coloured with promarkers, her hair was an experiment in Aubergine and dark blues. Love how it came out.
Then to use her for a card.
I used a box card format. This enabled me to use some of the many 3-d flowers that have been sitting in my stash for eons.
Many die-cuts in gold card to decorate the frame
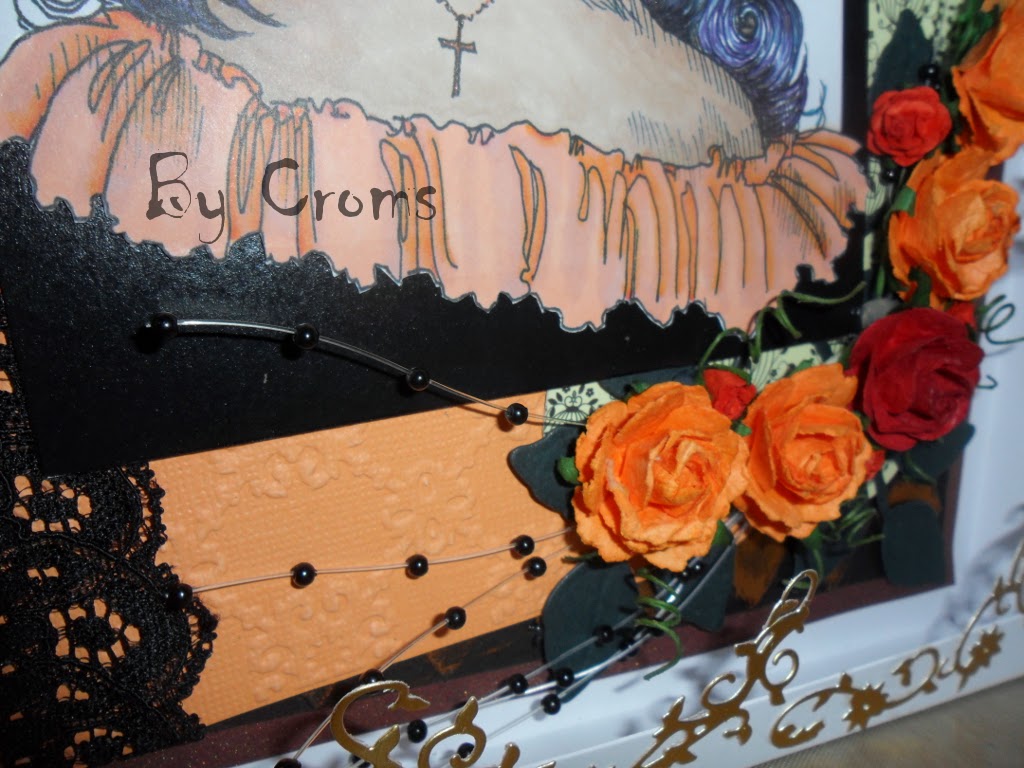
 Some embossed black card rubbed over with gilding wax, More embossed card in a peachy colour, some black lace, a scrap of DP (Noir et Chic) some black pearl sprays and roses in dark peach and red with some die cut dark green leaves
 All mounted onto a bronze/golden base
The box card houses all this comfortably.
Then it dawned on me........... OOOppsssss
Yes - It opens the wrong way!! Too late now - it's just like the last pages of a book instead of the front.  I hope the recipient doesn't mind.
The front cover - The same bronze/gold  as the base of the card with the negatives of one of the diecuts and gilding wax. Sorry about the glare but you get the gist

That's it from me for  today.
Thanks for looking

I'd like to enter this card into the challenge at
Chocolate, Coffee & Cards - Use a diecut
Passion for Promarkers - Spring Blooms - use flowers

Sunday, 1 March 2015

March Progressive Challenge with Rick St Dennis

Oh My Goodness - March already? Where did February go?

Being the 1st day of March, the new Progressive Challenge starts again over at the Sparkle & Glitter Blog. I'm on Team A therefore it's our turn to make something. The theme this month is Easter/Spring using a Rick St Dennis image from either the Zibbet or the Etsy shops.
I made a "little" origami box with lid using this video on youtube as inspiration using a sheet of 12"x12" double sided paper.

The image that takes centre stage is Daffo Dill Fairy


Torn out and mounted onto some bright yellow card

The lid has beed slightly adapted and is attached with a card hinge so that it doesn't blow away. 
Well we have been having some really strong winds lately


Some ribbon threaded through so that it can be carried by little hands
Just need to get the Easter eggs to go in it and that'll be one Easter gift finished

Thanks for looking

I'd like to enter this little paper basket into the challenge at
Country View - Anything Goes for the 2nd blogversary
Crafts Galore - March - Anything Goes

Monday, 16 February 2015

Carnival with Paint and Feathers

Ok - onto my project - following on from the last post with DecoArt paints and other products.
A large project for me - a 30x40cm canvas.

Image from the shop of Rick St Dennis - Carnival 2015
Coloured with Graph-It pens

canvas
Primed with DecoArt White Gesso

Paints used
Americana Teal Green, Jade Green,Wild Orchid, Royal Purple
Dazzling Metallics Teal, Amythyst

Weathered Wood
Matte Medium

Stencil - Brocade Motif

Other products - Spellbinders Gold Elements one
peacock, and other feathers in pale green, lilac and purple/dark green
Purple gems 2mm
stardust stickles
glossy accents
Beads - peyote stitched lilac seed beads with added faceted AB crystal effect beads

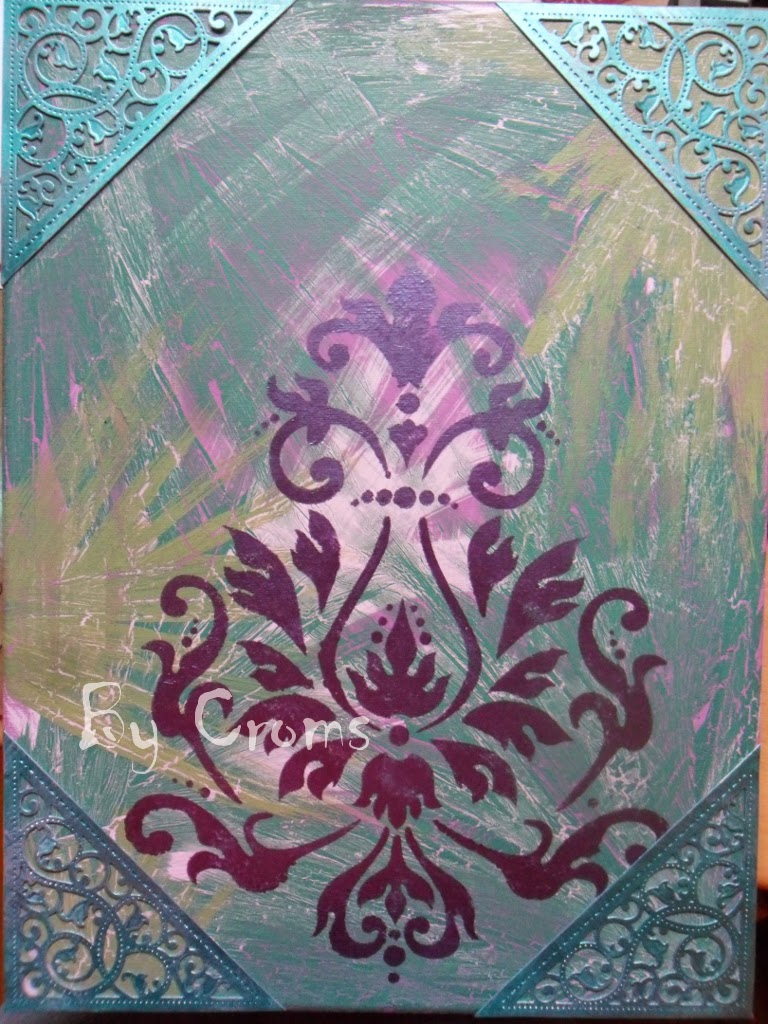
First layer of paint was the Royal Purple, swirls of Wild Orchid followed. When dry, a coat of weathered wood, applied thinly for the fine crackle effect. A two colour combo of Teal and Jade greens slightly watered down (50:50)for the top coat.
Go to bed so I can't touch until dry!
The stencil and the Amythyst come next
 mmmmmmmm yummy 
together with the corner die cuts - painted with the Metallic Teal and dry brushed with diluted Wild Orchid , applied with glossy accents
oops the middle WAS there - oh well

Feathers added using the Matte Medium as a glue and the beaded element to conceal the ends and add an extra touch.
The image was fussy cut out and stickles applied - even on her body stocking. Glossy accents to her shoes.

the image was applied to the canvas with more Matte Medium.
Final touch was the tiny 2mm gems to the corner elements

The canvas - that's going to be hung in my living room - once the decorating has been finished,
Sorry about the glare from the shiny metallic paints

I am entering this into the challenge at
Design Team Showcase - This project is both for Rick St Dennis and DecoArt

Sunday, 25 January 2015

Showcase for Rick St Dennis' EDT Blogs

Hi everyone.
Oh my, It's been a busy few weeks in the Cubbyhole lately and quite a few different projects have been made and now I can share 2 of them.
The occasion is the January showcases for Sparkle and Glitter with Rick and it's darker sister, Airless Chambers.
The task to choose Valentine images from the Zibbet and/or Etsy shops and create projects without using the traditional colours of red, pink or purples.

First up Airless Chambers
I chose the image Valentine Macabre available from both Etsy and Zibbet
The story of how this came to be.... Using Decoart products
A canvas primed with black Gesso
then a thin coat of Antique Teal Americana paint. When dry, another layer - this time with weathered wood

Now for the fun part.....
The normal way would be to let the weathered wood layer get to touch dry before going over with the next coat. It's late at night, freezing cold and I need to get this to a drying state. Experiment time.....
I watered down the americana light avocado about two parts paint to one part water, poured this onto the canvas and "teased" it with a brush to cover the surface.
I'm liking this
Bedtime
Next layer
Using the Distressed Harlequin Stencil and some Dazzling Metallic in teal
loving the distressed look
Some  diecut and embossed heart shapes were given a lick of antique gold, deep paint and dry brushed with butter then some hunter green Frantage embossing powder was randomly applied.
These hearts, some die cut letters and, of course, the main image were secured and sealed using decou-page. 
A couple of charms, a brass key and heart, and some pearls applied with glossy accents just to finish off.

My next project was done for 
Sparkle and Glitter 
beware - cuteness coming 
A rocker card with Valentine Turtle
This card not only rocks from side to side but our little turtle is on a spring as well

The gold hearts are from paper artsy, randomly stamped onto a black card base
Those images were all coloured with promarkers


Thank you for joining us on this little show

Thursday, 1 January 2015

First Post of 2015 with Rick St Dennis' Prog. Challenge

A Very Happy New Year to you all. 
I hope this coming one is better than the last. Last year had it's ups and downs and this coming year will probably have similar but I'm hoping more ups than downs this time.
One of the ups already ..... see my newer post...........

For this update in my crafting adventures I am concentrating on the new progressive challenge that is starting over on the Sparkle and Glitter with Rick St Dennis blog. As I am on team A I get to post in the first episode.
As always on the first month it's Anything Goes with a Rick St Dennis image that is available in either of the shops. Zibbet (Europeans are urged to use this store due to those utterly ridiculous VAT laws that come into force today, also it's cheaper) and Etsy.   

I made a card, for a change. One was needed for a birthday.

Here we have Roxy, coloured with promarkers then fussy cut out before mounting onto a chocolate brown diecut . The DPs are taken from a collection called "old treasures" found on a wander round whilst on holiday last year but no designer name.

  
This shows the acetate window that was created... just to be a bit different. Some lace and ribbon hide the joins. A stamped and heat embossed sentiment to tie in with the image.
Want a chance to get more images from the pen of RSD?  Join in the Progressive Challenge and get next months image free. Simple!

Wednesday, 3 December 2014

12 Days of Creepmas with Rick St Dennis and Smeared & Smudged

Morning all.
Today is the 2nd day of the Creepmas hop organised by the gals over at the Smeared and Smudged group. They used to be on a ning platform but are transferring to facebook and December is the transition month. Hence the info can be found on both platforms. Terra of Smeared Ink is the host and her blog is the starting point of the hop and more info can be gleaned there.

Rick St Dennis' Airless Chambers is, again. taking part and today is "my day".  Today is also designated "Smeared Ink day" when the projects, if possible, are to be made with stamps available from their shop. It was with this in mind that my first project came into being. I have used stamps from the Dark Holidaze rubber set, designed by Rick St Dennis.
An old tatty tray that has been sitting in my craft room for "a while" got a bit of a make-over with some deco-art paints.
Firstly - the base of the tray. Plenty of masking, colouring with promarkers and then inking with iced spruce distress ink.

The old tatty wooden tray was strengthened on the corners with strips of torn card scraps, inside and out (tearing helps disguise the edges) then coated with white gesso, just in case the was any residual oil in the wood. Second coat Decoart's Pure Pumpkin acrylic paint. When dry, a coat of Weathered Wood. More drying time. Next a coat of purple, sit back and watch the magic happen. The leaves were painted with Blue/green light acrylic and dusted with mica powder. The edges were all given a coat of copper "dazzling metallics" acrylic paint.


When all the paint was dry, a generous coat of decou-page was applied, used both to adhere the stamped panel and to seal the entire project.

My second project was made using Rick's digi images available from the Zibbet shop.
A wreath to decorate a door (possibly?)


Orange and purple satin ribbons on a circle of card (cereal box) wrapped with hessian. Die cut black holly leaves and swirls

 some glossy accents were applied to the lights for added shine and dimension.

I'd like to enter my tray into the challenge at
Smudgy Antics - Anything goes with SI