Showing posts with label AlteredItem. Show all posts

Monday, 11 May 2015

Time for a Bit Of SteamPunk

Good evening people.
I just had to make this. My imagination was flying away with me.
I had the good fortune to visit the Sincerely Yours Craft fair yesterday. One of the traders there was The MDFMan. If only I had more pennies!! So many gorgeous MDF items for sale! I plumped for a clock with various cogs. As well as a couple of skull sets that needed a good home.

What did I get excited about?
Well this is my version..........

............and the story of how it came to be.

Out came the Decoart paints etc and everything was given a coat of black gesso to seal.
As the large face was dry first - that got the first treatment. A thin coat of deco-page and a sheet of paper from the Prima "Time Traveller's Memories" pad. Well stuck down before cutting down and then sanding. Finishing the edges with a brushing of "vintage paper" distress ink. Then with the Decoart stencil "Timeless Treasures" and some copper "Dazzling Metallics", added the numbers for the clock, off-setting the primary numerals. The image of the timepiece and wings is using 3 of the stamps from the Visible Image "Time After Time" set.
Next up the larger cogs that came with the collection
They were daubed with a few colours of the Decoart Americana paints. Antique Rose, Antique Teal Pansy Lavender and Traditional Raw Sienna. When dry a thin layer of Decoart Media Raw Umber Antiquing cream rubbed on before over stamping with an IndigoBlu crackle stamp.using stazon.
The small cogs were coated with Decoart Americana burnt umber mixed with Decoart texturizing medium. Then dry brushed with butterscotch and a bit more copper.
some glossy accents, brads, a length of chain. It's beginning to come together.
Needed something else..........
Those Visible Image stamps again. This time several wings, left and right, stamped onto kraft card and cut out decoupage fashion and layered up. Stuck together with silicon glue before triple heat embossing. My melting pot is no where to be seen tonight. The clock face stamped onto dark brown and heat embossed with white. Applied to the clock with more silicon glue.

I had to be careful all along the way, ensuring that minute hand was not going to be impeded on it's journey around the face and several times had to change the placement of those cogs before finally sticking down. The joys of practicality!

Thanks for looking and hope I haven't bored you with all the details

I'd like to enter my clock into the challenge at
Love2Create - Anything Creative / Mixed Media / anything goes
That's Crafty - SteamPunk Surprise

Monday, 4 May 2015

May We Have A Quick Word - with HDH

Well according to the calendar it's the month of May. According to the weather ...... seems more like March! Begins with the same letter so I suppose there's some similarity. Cold, windy and wet in this corner, but we did see an hour or two of the sun, so blessings must be counted.

Being the first Monday in the month means it's the start of a new challenge over at Haunted Design House. This month the challenge is entitled

May We Have A Quick Word

This month we'd like you to either use some text somewhere on your creation OR make it a quick make - less than a day from start to finish. One stipulation it must be a twisted, dark, macabre or Gothic creation. No sweet and fluffy makes will be included in the voting. There are enough mainstream challenges to enter those projects in.

My make took less than a day to create and has one word on it. Another altered domino - one of the travel variety that are a bit smaller than the norm, being only 3 x 1.5cm.
 Just to prove it is a domino - the back view
 A close up of the central feature. A bead wrapped domino with the word "Nevermore" and grid pattern from the Smeared Ink "Quoth the Raven" set and a tiny raven from the Holy City set 1
Stamped onto paper and applied to the domino with and coated with glossy accents.
While this was drying, I started on the beadwork to surround the domino using another as a gauge for size. For those interested - the main body of peyote stitch using size 11 hex beads in a black AB colour. The curve inwards created by using smaller beads (size 11 delica) for a couple of rows before switching to size 15 seed bead for 1 row. The loop created used ladder stitch.
Attaching the pendants of bird skulls and domino - just simple bead loops.
To stop the skulls moving towards the centre - some simple thread whipping round the leather thong.

A simple hook and eye clasp glued to the thong ends. Finished. Drying time of the domino meant this project took longer than the hour it took to create everything else.

There we have it, a simple necklace with a difference.

I'd like to enter this necklace into the challenge at 
Dream In Darkness - Anything Goes
Smudgy Antics - Anything Goes

Monday, 6 April 2015

Going Green - with HDH

Haunted Design House has a new challenge starting today and with all the greenery that spring brings as well as the thought of new life got twisted about as only the Minions can do......
The theme then turns into
Turn Green (with envy)

So with the thoughts, maybe, on bringing new life into an old and battered piece of "junk" or a project that has mainly the colour green in it or ......... you get the idea. 
Susan has more ideas over on the blog. Her narrative is inspiring!!

My project ....
the upcycling of an old coffee tin
from this
 Then a piece of glossy thick paper daubed with different distress inks in shades of green.
This was then coated with the soot of a cheap candle
 Various stamps from the "Fringe" collection from Smeared Ink were then stamped into the soot.
After a couple of coatings of cheap hairspray to set.....
the paper was cut to size and wrapped around the tin,
The top and bottom coloured with alcohol ink (promarker)
then the final touch - a circle of grunged up paper with yet another element of the stamp set used and stuck down to the lid

A scrap of ribbon to neaten and that coffee tin now feels at home on my craft desk.

Your turn now
Go visit the HDH blog for more inspiration on upcycling etc and show us what you come up with

Monday, 2 March 2015

Stand In The Naughty Corner with HDH

Starting month three of our new monthly format at Haunted Design House - this time it's about those corners, with a twist if you want to use, that of Naughty/Nice.

It was left (almost) to the last minute here. Birthday weekend meant not so many hours in the craft room so the twist went out of the window.

A battered old cigar box that has been waiting for a makeover was my canvas.
A bit of sanding to remove the splintery bits then some Decoart Americana paint in Red Violet along the edges that would not be covered in embossed card. (Darice - crackle).
With that dry, the card was painted with Decoart Royal Purple America paint first then some dry brushing with Mulbery and Wild Orchid.

The corner embellishments are cut from black card using a spellbinders Gold elements one set.
This set embosses as well as cuts. Some Decoart Metallic Lustre in silver was added with a trusty finger and buffed up before attaching to the box. Some tiny black pearls added to resemble rivets.

The silver lustre was also lightly added to the painted edges. The side corners were not left out. A sizzlet die to the rescue. More silver and pearls.
The inside was covered in a piece of DP with Decoart Decou-page in the antique finish and the whole thing sealed.
Now I just need to find my box of catches to add that finishing touch and allow the box to be in a totally finished state,

I'd like to enter my altered cigar box intoi the challenges at
Altered Eclectics - Altered Item - March
Country View Challenges - Anything Goes

Wednesday, 3 December 2014

12 Days of Creepmas with Rick St Dennis and Smeared & Smudged

Morning all.
Today is the 2nd day of the Creepmas hop organised by the gals over at the Smeared and Smudged group. They used to be on a ning platform but are transferring to facebook and December is the transition month. Hence the info can be found on both platforms. Terra of Smeared Ink is the host and her blog is the starting point of the hop and more info can be gleaned there.

Rick St Dennis' Airless Chambers is, again. taking part and today is "my day".  Today is also designated "Smeared Ink day" when the projects, if possible, are to be made with stamps available from their shop. It was with this in mind that my first project came into being. I have used stamps from the Dark Holidaze rubber set, designed by Rick St Dennis.
An old tatty tray that has been sitting in my craft room for "a while" got a bit of a make-over with some deco-art paints.
Firstly - the base of the tray. Plenty of masking, colouring with promarkers and then inking with iced spruce distress ink.

The old tatty wooden tray was strengthened on the corners with strips of torn card scraps, inside and out (tearing helps disguise the edges) then coated with white gesso, just in case the was any residual oil in the wood. Second coat Decoart's Pure Pumpkin acrylic paint. When dry, a coat of Weathered Wood. More drying time. Next a coat of purple, sit back and watch the magic happen. The leaves were painted with Blue/green light acrylic and dusted with mica powder. The edges were all given a coat of copper "dazzling metallics" acrylic paint.


When all the paint was dry, a generous coat of decou-page was applied, used both to adhere the stamped panel and to seal the entire project.

My second project was made using Rick's digi images available from the Zibbet shop.
A wreath to decorate a door (possibly?)


Orange and purple satin ribbons on a circle of card (cereal box) wrapped with hessian. Die cut black holly leaves and swirls

 some glossy accents were applied to the lights for added shine and dimension.

I'd like to enter my tray into the challenge at
Smudgy Antics - Anything goes with SI

Saturday, 1 November 2014

Take Time to................with RSD

The start of a new month. November heralds the start of the Christmas rush for many, but also when the weather really starts affecting me. The cold, gloomy, damp mornings are a struggle to get through for me as, I suspect, many of you out there. Wrap up warm and craft.
The 1st of November especially sees the beginning of a new Progressive Challenge over at the Sparkle & Glitter Blog of Rick St Dennis' EDT.
I made a clock face using Art on the Brain from the Etsy or Zibbet shops
 The greyboard base was first primed with gesso. Then the painting really started.
 Decoart paints in warm white, yellow oxide, quin. gold, and red oxide using imagination crafts stencils and stamps from Visible Image. Yes, you can use acrylic paint on your stamps - make sure they're well cleaned after though.
The image was coloured then printed onto copy paper and adhered with gel medium, left to dry before wetting the paper and rubbing off gently. The whole thing was then painted with clear crackle then sealed. (Americana decou-page)
The little skulls? these were made by making a mould of a bead then making 12 paper clay impressions. Then painted with the same paints as the clock face with just a touch of mica loaded paint.
The clock mechanism was shop bought.

OK - your turn to create. Something - Anything Goes for the first part - with an RSD image and enter into the challenge

I'd like to enter my clock into the challenge
Imaginations Crafts - Anything Goes

Monday, 13 October 2014

You WOOD Do that! with HDH

Post #2 for today
It's the second week of the challenge at Haunted Design House.
We have the very talented Maureen (Mo) Scott featuring as our Guest Minion and you really need to see her make-over!!
I was really lucky to actually meet our Mo at a recent craft fair, she is as warm in real life as she is on-line **smiles**
Anyway, I digress,
The challenge this fortnight is all about the wood! We need to see some wood - real or fake it.
I altered a little box - just a little - a box that cost pennies at a "carboot sale" - one of those British things. People bring along their unwanted junk for others to choose to give a new home at a small cost. Is the US version a Yard Sale?
This little fella was looking a bit beaten up - the varnish all chipped and cracked etc. A good rub down with sandpaper sorted that. Amazing what a lick of paint and a covering of gilding flakes can do. I wanted the top to be the focal point but the sides needed a bit of coverage. These were covered in a piece of DP on which I had stamped images.
With stamps from DeStempelwinkel and Lost Coast
From Smeared Ink
 More DP covered the top
A scrap of paper, aged and stamped with a script stamp from Paper Artsy formed the scroll with some wooden (bamboo) holders. Some little pen nibs, one made into a little quill and some tiny bottles to accent.
Still a useful little box with drawer at the bottom, but oh so much prettier than before.
You have another 6 days to get your bit of wood entered into the challenge so we can come and leave some bloggy love. Then one more challenge before the Minions of the Dungeon are allowed to hibernate for the winter.

I'd like to enter this into the challenge at
Addicted to Stamps - Anything Goes

Monday, 14 April 2014

SteamPunk Junk with Haunted Design House

Oh I had such fun with this project. Even if I did get a blood blister on my thumb! Ouch! My colouring hand to boot! All for the sake of my "art"
This project started life as a dingy old lamp but I loved the shape. Then along came this challenge and it seemed made for my base.
The challenge in question was for Haunted Design House.

SteamPunk Junk

Well, it's not necessary to go rummaging in the bins - but to use something that would be thrown away by any "normal" person. A bit of up-cycling is the name of the game.

This is what I came up with


and yes it is functional

Covered with a multitude of chipboard cogs, some chain and wire coils then a few coats of paint of varying thickness (a bit of sand added to the first coat for added texture).
Then came the decoration of the panes
All the designs are painted using glass paint
 There were stamped images that each design was loosely based on. Mostly from Ali's Inky Fingers with a bit of Creative Expressions. The images stamped onto paper under the glass then interpreted for ease of painting the outlines.

Your turn - what piece of junk can you turn into steampunk art?
Looking forward to seeing those pieces at HDH.


I'd like to enter my lamp into the challenge at
Left of Centre - Anything LOC /Dark Themed
Craft My Life - Anything but a Card
Through The Purple Haze - Anything Goes
Quirky Crafts - Mixed Media
That Craft Place - Anything Goes
Sandee & Amelie's SteamPunk - Use a favourite Technique ( geez I have so many)

Friday, 7 March 2014

Delicious Doodles Day - First the Challenge

Yep - today in the Cubbyhole is the turn of Delicious Doodles to be featured.
First up is my piece made for the ANYTHING BUT A CARD challenge that starts today.
I altered a note book. One of those cheap and cheerful, bought for a pound, spiral bound notebooks. Maybe I should have thought about this and taken a "before" piccy, but I didn't. Oh well..........
This the "after" though.....
featuring the Delicious Doodles images "Steampunk Mermaid" and "Steampunk Heart"
Coloured using graph-it pens
The "NOTES" using a stencil and distress ink

The side

back

and inside did not go unadorned
here you can see the spiral binding 

Three different embossing folders for the different areas.
Satin ribbon to tie it all together.
Job done

I'd like to enter this altered notebook into the challenge at
Crafty Ribbons - Anything Goes - with ribbon

Monday, 1 July 2013

In the Wild

Smudgy Antics day here in my cubby hole as it is Monday.
This week starts the beginning of a new challenge......
In The Wild

Now this can be taken in a number of ways. Original thoughts turned to all things that are not domesticated - found in the wild. Create a scene, maybe, depicting life outside the comfy four walls that most call home. Use actual elements of the great outdoors such as twigs, sticks, leaves, flowers, feathers, and stones, etc.  The Smudgy Antics DT have come up with a number of different interpretations and it would not be time wasted - checking out their projects.
Me? I altered a box. The original box contained a beginners card making kit with handmade paper, I think, and was already divided into two sections.
The inside of the box was already lined with cream coloured handmade paper and has a lovely bumpy texture. I didn't want to lose this so I just went wild with some spray inks. I did cover the outside with some kraft paper as this was not the prettiest sight.
The left hand partition is just the right size for a "set of shelves". Another re-purposed little box. This one is made from wood and has a bit of a grain to it. Walnut stain distress ink was sponged on here, as well as all the edges of the main box. The front edges were then all treated to some old gold buffing wax.
All the stamped images are from the Smeared Ink, Specimen Jar Digi set. and were coloured with promarkers with a touch of distress ink on the little butterflies on the jar labels. All the little jars in stash.


That bottle at the back on the bottom RHS - part of the digi set. I just added a touch of silver gel pen to the lid as well as the DI coloured butterfly. The butterfly is made from feathers and was part of a RAK a couple of years ago. The other one I made using air dry clay, feathers, some wire and patina stickles.


Some flowers (from another RAK) and I called it finished.

Looking forward to seeing you all "GO WILD" with us at Smudgy Antics

I'd like to enter this into the challenge at
Bunny Zoe's Crafts - Things with Wings

Tuesday, 4 June 2013

2013 Skull-a-bration Day

I can hardly believe a whole year has passed since the massive bloghop of 2012 celebrating the beauty of the cranium. This little (???) party has been organised by the gals over at Smeared Ink/Smeared & Smudged forum and is only a small part of the world wide tribute to that bony shell that contains our brain. For more info on the world wide event, the Skull-A-Day Blog and for the Smeared & Smudged participation, follow the links.

If you are following the hop order then you will have arrived, and still be reeling, from the amazing Bombshell Girls creations. If you have arrived here just on the off chance, then may I suggest that you start up at Terra's blog and see the whole wonderful array from start to finish? If you're just lost - well the whole blog hop order is there on the left hand side bar of my blog.

I have two projects to show today.
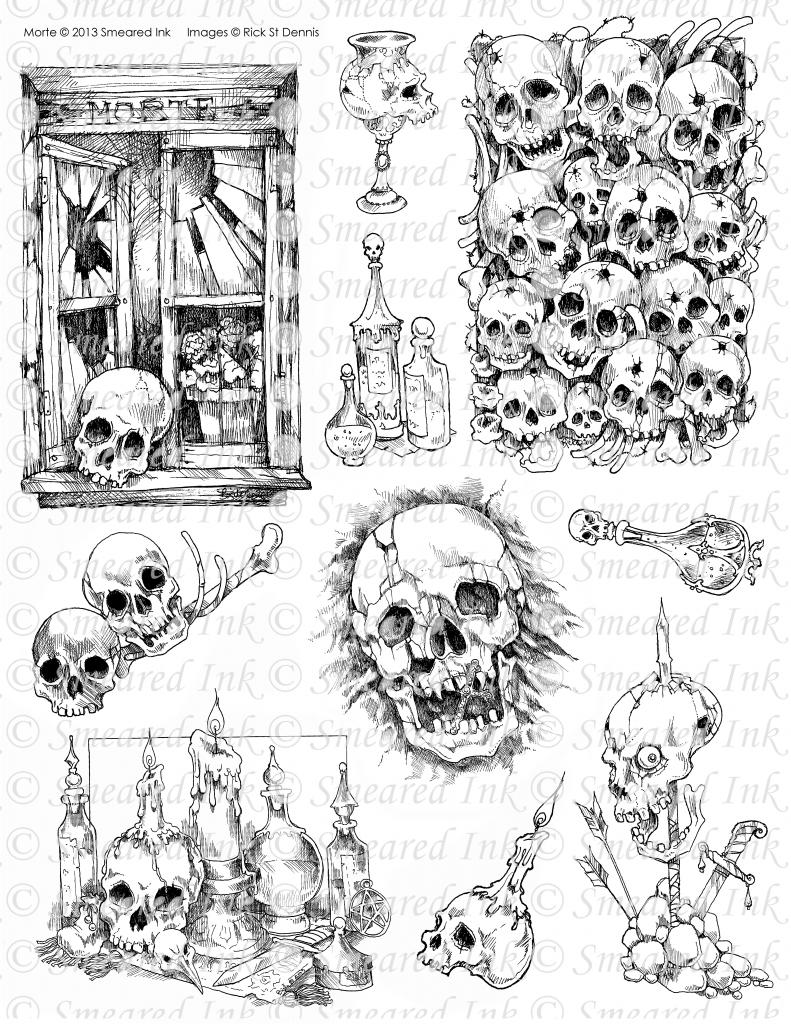
The first features just one of the images that are to be only available through the Smeared Ink Rubber Club for June. This project was created using a digital version. As a member of the DT, I was lucky enough to be able to use this as a preview. The set is called MORTE and created using the fabulous artistry of Rick St Dennis who has now joined the Smeared Ink's awesome collection of artists. You really need to check this collection out!!
If you are a lover of Rick's fabulous work and can't wait for the rubber set then why not head on over to his Etsy shop and have a look at the selection of Skull images there.

An altered cigar box.


different aspects here of the entire box, showing the dimension of the decoupaged front and the stencilled sides and back (Andy Skinner). The image was coloured with promarkers on both top and front. Because of the limitations of the light available here in Scotland, I scanned the image before attaching to give a better idea of the colour. That's distress ink you see colouring the white card base.

The paper covering and lining the box was purchased from Crafty Chaos, who sadly are no longer trading. The "wrought iron" on the corners are from a Sheena Douglas set of rubber stamps.

The second project is an altered key cabinet


This is lined with papers from the same Crafty Chaos papers. The whole box was washed with acrylic paint before the addition of gold metallic rubbing wax on the edges. Various rubber stamped images from Smeared Ink's Quoth The Raven, Lost Coast and Tim Holtz were then adhered. The side edges covered with a copper coloured ribbon and punched paper using MS drippy goo. The hooks that came with this salvaged piece need to be replaced. The white plastic covered ones really do not "go".

Thank you all for taking the time to visit my little corner of bloggy world and hope you enjoy the rest of the amazing projects. Again, if you get lost, the left hand side bar here contains all the blog addresses of the other artists that have dedicated their time and join with me in this Skull-a-bration blog hop.

Both my projects fit the bill of the challenge at Craft My Life - a re-launch of the challenge blog where anything but a card is the norm
They also fit the challenge at Created with Love - Anything Goes. Who doesn't just love their noggin?
The challenge over at Simon Says Stamp is to use the letter S in projects, well I have loads of SKULLS here so would like to enter into this challenge as well.
The Hobby House challenges have an Anything Goes challenge this month as their first ever challenge

Monday, 13 May 2013

A Grumpy Box

Haha, the box has Grumpies on it, the box might be grumpy - I didn't take time out to ask it.
"Alter a box" is the challenge over at Smudgy Antics this fortnight. This is the second week of the challenge run, you therefore have just under a week to get those altered boxes finished and linked into the challenge so that we can ooooooo and aahhhhhhhh over it.
I had this small collection of old cigar boxes and it's one of these that got the feel of paper and paint this week.
The surface was covered with card that had been well crumpled then given a coat of blue paint. When dry, was dry brushed with orange which gives the box the older and well handled appearance.
Some orange and blue ribbon came next.
Then there are Grumpies stamped onto circles of shrink plastic stuck to the front with two of the sentiments that come with the set. The Grumpies are from a rubber set previously available from Smeared Ink. The digi format is available here.
The rubber set comes with two different sizes of our cute little friends and it is the smaller version of the set that was used on the handle. Stamped ans coloured up with distress ink before adhering to a TH facet with glossy accents. When dry, a small length of chain and a screw in eyelet attaches it to the lid of the box.
Round the sides, here we have the full sized version of the image. Again stamped, die cut and coloured with distress inks. The eyes have been given a comic treatment in to form of some large "googly eyes".
For the top - more die cuts. This time, some "label holders". These were heat embossed with frantage embossing powder before sticking over the labels.
The sentiments are the same as those used on the shrink plastic discs. Some screw effect brads had their feet cut off and glued down as well.
The inside of the box did not get over-looked.
This was covered with one of a set of papers from a shop that is, unfortunately, not still operational. Crafty Chaos' "Creature Feature". Printed out and stuck inside.
There we have it folks. A simple box that I know one large person is itching to get their hands on.

Get those boxes linked in as I suggested to the challenge. That prize could be used towards any of the sets available as a member of the Rubber Club - tell them Croms sent you - or towards any of the many digis in the Smeared Ink Shop.

I'd like to enter my box into the challenge over at
Craft My Life - Non Card Projects
Fashionable Stamping - Anything Goes
Quirky Crafts - Myth and Magic - must use paint. (I know the Grumpies are magical, they can make most people smile)
That Craft Place - Makes for Men