Showing posts with label SmearedInkRubberClub. Show all posts

Saturday, 14 December 2013

Baubles and more baubles

Well, so far I have fought off the putting up of "The Tree", I like it going up after my daughter's birthday on the 12th and it's always been a tradition in my home for a family activity when all are present just before the big day. Looks like it's be this weekend that the battle will be lost by me. No more excuses. I have however been making some new baubles for the seasonal decoration that takes over our room.
I have used a variety of techniques and, in deference to the different tastes of family and friends, stamps from different sources.
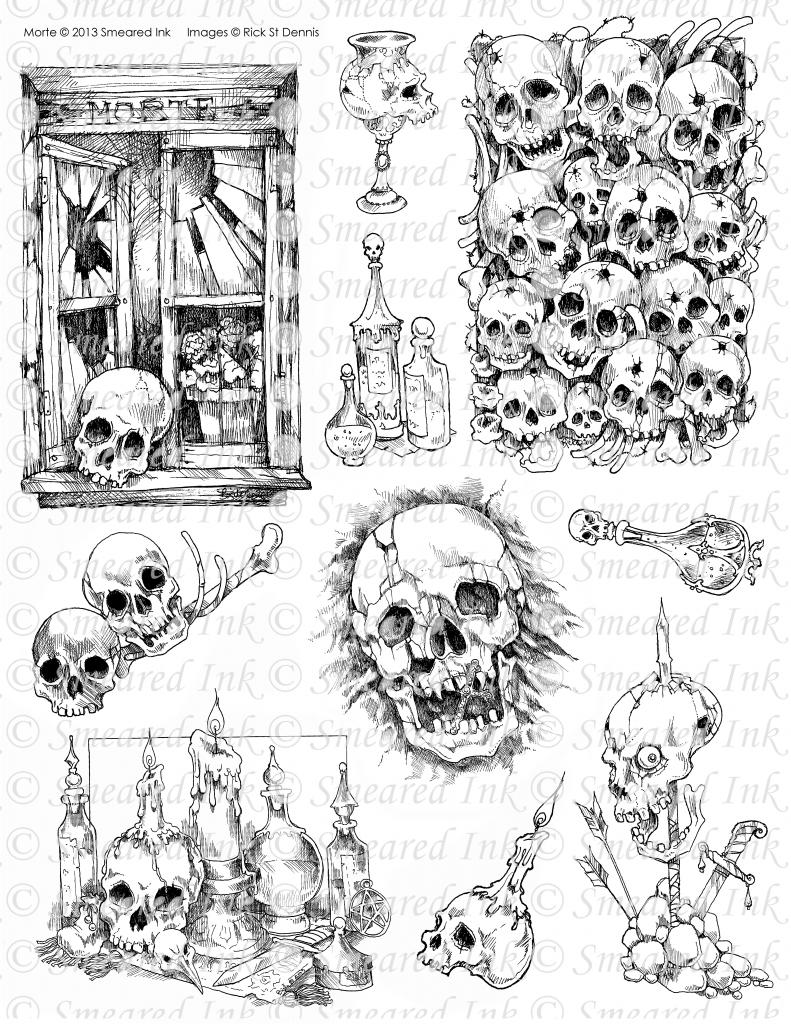
My first batch are using my new rubber stamps from Smeared Ink and images drawn by Rick St Dennis - Dark Holidaze.
All are wooden, some are altered jigsaw pieces and some are precut from Indigo Blu.
 Primed with white gesso, stamped with green pigment ink and dusted with yellow ochre. burnt sienna and copper pan pastels


 Primed with black gesso, stamped with clear embossing ink and dusted with copper panpastels

 primed with white gesso, sanded back slightly, stamped with green pigment ink and heat set. The other side  was primed with black gesso stamped with clear embossing ink then dusted with copper and green perfect pearls. purple gilding wax round the edges

Primed with black gesso, stamped with silver pigment ink. Heat set before painting with perfect pearls

Primed with black gesso, stamped with silver pigment ink that was wiped randomly on the bauble as well then all heat embossed with clear EP.

I'd like to enter my tree baubles into the challenge at
Left of Centre - Winter or Holidays

Monday, 2 December 2013

Grumpy For Christmas

Me, I'm always grumpy leading up to Christmas. Not my favourite time of year for many reasons. I won't bore you with the details, suffice to say, the best time of the day is midnight - just before the 26th. I do however make a few cards for those family and friends that will appreciate them. Some of my favourite characters are The Grumpies from Smeared Ink. They fit just about every occasion and there are now quite a few to choose from and make fab cards for the menfolk in our lives. There's one particular man in my life that just adores them and this is his card.

 I followed sketch # 73/74 from the Papertake Weekly files. The spotty DP is from a #2papercraft 4 you"  Christmas collection and already has "Merry Christmas" printed all over it. That's the sentiment taken care of. A square of frayed hessian with some copper and gold ribbon. A square of green inked kraft coloured card and topped off with our main character. The card base was dusted lightly with distress ink to take away that stark whiteness.


This little Grumpie comes from the "All Occasions" rubber set from Smeared Ink. Coloured with promarkers, glittery gel pens and metallic markers with some woodware "Fluffy Stuff" applied on the hat fur.

I's like to enter this card into the challenge at
Papertake Weekly - Sketchie Free-for-all using sketch # 73/74 (they are both the same)
Smeared and Smudged Forum - "Smudgy Antics" Anything Goes with a Smeared Ink Stamp
Stamping Sensations - Free and Easy

Monday, 25 November 2013

Anything Goes at Smudgy Antics

Hi there peeps. It's the last week of not only this Anything Goes challenge at the Smudgy Antics blog but also the last challenge on the blog. All future challenges will be held within the Challenger section of the Smeared and Smudged ning forum.  It's free to join and so much going on with all the new stuff, as well as old favourites, it's well worth a visit or four.
My piece for this week is a variation on the Christmas Wreath. I used the Smeared Ink rubber stamps from the "Gothic Christmas" collection.

The images were stamped using Stazon onto felt, cut out and glued to the prepared wreath.


The wire ring base was first wrapped with wadding and strips of hessian on top of that a couple of retaining stitches held it all in place.
Some colour was added with fineliners. I was not about to use my promarkers near the stazon ink.
Some felt mistletoe added with a little bow and a grosgrain ribbon hanging loop before topping off with that fabulous reindeer head.
That's about it from me today.
Come along and join us with this fun challenge. Think outside the box and surprise us.

I'd like to enter this Christmas wreath into the challenge at
Stamping Sensations - Christmas

Monday, 18 November 2013

Anything Goes at Smudgy Antics

I don't know about you but when the theme of any challenge is an "Anything Goes" my mind goes blank. So many things I could make. What do I want to make? What do I need to make? So many questions swimming around in this empty  noddle of a head. That very theme is the new challenge over at Smudgy Antics for the next two weeks. So, what am I to make? I ended up making a simple tag. One for the different and like-minded friends I love.
I used the Gothic Christmas rubber set from Smeared Ink.

I cut a simple tag from rich red card stock and heat embossed the tree on it with black powder. The bat and wreath was stamped into clear hot glue. When cool, this was dusted with a mixture of perfect pearls and pan pastels.

A few flat flowers added at the hole and secured with an eyelet. Some ribbon and fibres to finish. Simple, as I said.
So, what are you waiting for? Get those projects linked up to the Smudgy Antics challenge so we can all enjoy your eye candy.

I'd like to enter this tag into the challenge at

Craft-Dee BowZ November challenge - Anything with a hand made bow

Monday, 11 November 2013

Fire and Ice

Oh my. Is it really a week since I last blogged anything. I haven't been idle..... honest. It's because I'm working on a project that is taking some time to complete. As well as this -- my project for week two of the Fire and Ice challenge over at Smudgy Antics. The competition is wide open still for the next 6 days.
I altered a bottle for this project. Made it into a candle holder. Well there's fire for you. Wait, there's more....

 The bottle was coated in gesso before wrapping with hessian (burlap) strips. Some copper wire threaded with red bicone beads and steel wire with blue and clear beads was wrapped around. Then left to dry off a bit before adding the next bits.

 This is the fire goddess from the Smeared Ink rubber Elementals set
and this is the water goddess from the same set.
My stamping medium - well that's hot glue. I made a large puddle, using yellow and red for fire and blue and clear for the ice, onto a piece of baking paper on my heat resistant mat.then pressed my stamp into the hot glue and let it all cool down. No, the stamp is not damaged. I've seen this done with clear stamps and they weren't harmed either. The advantage here is that the glue panel is flexible unlike UTEE. The fire goddess was give a wipe over with copper pan pastel and the ice panel with silver perfect pearls. Then sprayed with hairspray to set.
Some holes made in the panels and joined with more copper wire. More pan pastels in copper and blue sponged onto the hessian. Some firey red and icy blue and white flowers added for more interest before adding the candle.
Simple but very messy. I had a ball!!

I'd like to enter my candle holder into the challenge at
Crafting by Designs - Anything goes
Premium Craft Brands - Anything Goes/Something Altered
Craft My Life All Crafts Challenge - ABAC

Monday, 4 November 2013

Fire and Ice with Smudgy Antics

Smudgy Antics has a new challenge starting today.

FIRE AND ICE

We want to see how you interpret this. The DT have come up with a few ideas, but we want to be inspired by you as well.

I made a simple AJ page using two of the images from the Elemental Goddesses set.
For those lucky people in the Smeared Ink Rubber Club, these stamps should be hitting your doorsteps very soon if they haven't already done so.
Fire and water were the images chosen. Coloured with promarkers before given their separate treatments.
The Fire Goddess was burnt round the edges. An obvious procedure I think. The frozen water goddess was sealed first with Decoart sealer before painting on Rock Candy. When this was dry some weathered wood DI sponged on lightly and another coat of sealer.
The paper used is digital from Smeared Ink's "Slasher" set.  The colour was altered digitally diagonally before printing.
Cut to size 8"x8" to fit in my journal. The "Fire" word is from the same Elementals set the "Ice" is just a set of  alphabet stamps I have.

It looks simple now I look at it again. 

Wednesday, 23 October 2013

Day 23 of 31 Days of Hallowe'en

For full deets on this Freaking fangtastic Blog hop organised by Smeared Ink and The Smeared and Smudged forum, please hop on over to Terra's blog. All the info on the days sponsors are there as well as any other info you think you might need.  The blog hop roll is there in my side bar.

Good morning folks
Today I have for you an altered coffee tin. It's been sitting on the side patiently awaiting a make-over for a few weeks. Until, that is, it fell to the floor as if to say "Oi! It's my turn now!!" Who am I to argue?
Something a little different as well. Some soot stamping. I love the spooky effect this can produce.
The main stamps used were designed by Rick St Dennis for Smeared Ink's Rubber club. They feature in the Haunted Places set 2. Other stamps are from De Stempelwinkel and stamps from an unknown source - bats and moon with bats.
I scanned the stamped cover before applying. I know how hard it is to get a pic of a round object.

The finished tin - I took pics in different lighting conditions - each shows different properties.
With flash
without flash
the other side
and the top detail
Some narrow braid applied to the bottom and some fibres to the top with some bat sequins.
I don't know what I'll use it for ... yet. Maybe a sweetie jar for those trick or treaters to dip into..... maybe not.

Thank you once again for all the kind comments from you - the merry band of Horrifying Hoppers.
Tomorrow brings ..... who knows?
Thank you for looking

I'd like to enter my altered tin into the challenge at

Unruly Paper Arts RAQ 2 - Bats  (voting starts on 26th October - your vote for the top project would be appreciated)
Through The Purple Haze - Anything Goes - with a twist of Hallowe'en

Sunday, 20 October 2013

Day 20 of 31 Days of Hellowe'en

For full deets on this Freaking fangtastic Blog hop organised by Smeared Ink and The Smeared and Smudged forum, please hop on over to Terra's blog. All the info on the days sponsors are there as well as any other info you think you might need.  The blog hop roll is there in my side bar.

Good morning folks
Just a little ATC for you today, created mostly digital. Although I did print it out as well.  It features images from two of our sponsors for this little shin-dig.

One is Altered Pages. So many collage sheets available - and not just for Hallowe'en, and much more.
The background image and "sentiment" is from the "Night Terrors sheet".
The archway - That's from the Haunted Places 1 rubber set available from Smeared Ink from drawings by Rick St Dennis. So a right old mish-mash
So yes - a quick and simple project for today.

There will be more tomorrow as it's both the start of a new challenge at Smudgy Antics also my week to post for Haunted Design house and their current challenge.
So see you tomorrow folks.

Monday, 14 October 2013

Day 14 of the 31 Days of Hallowe'en

For full deets on this Freaking fangtastic Blog hop organised by Smeared Ink and The Smeared and Smudged forum, please hop on over to Terra's blog. All the info on the days sponsors are there as well as any other info you think you might need.  The blog hop roll is there in my side bar.

Good morning folks.

I have another tag for you today. Not so simple but great fun to do. Just took a bit of masking to achieve.
It is the second week of the Smudgy Antics challenge. The theme for this is
ALL SMEARED INK
Whatever project you submit must be made using only Smeared Ink Stamps. If you're lucky you'll have previously joined the Smeared Ink Rubber Club and have loads to choose from any way. If you aren't, all is not lost because there are loads of digital stamps available in the shop as well.

The tag uses three of the images from the Haunted Places rubber stamp sets. Yet another set drawn by Rick St Dennis exclusively for Smeared Ink.
Masking the front two images to place the third then masking that to apply the distress inks for the sky and foreground. All the images were coloured with promarkers. The word "Haunted" is stamped using the credit bit on the stamp set - the bit that gets overlooked very often and thrown away by some.

So whilst you are making those projects for 31 days of Hallowe'en, spare a couple of minutes and come link up those All Smeared Ink projects so we can all see them.

Thank you for all your kind comments in this marathon, they are really appreciated.
See you all tomorrow


Friday, 11 October 2013

Day 11 of 31 Days of Hallowe'en

For full deets on this Freaking fangtastic Blog hop organised by Smeared Ink and The Smeared and Smudged forum, please hop on over to Terra's blog. All the info on the days sponsors are there as well as any other info you think you might need.  The blog hop roll is there in my side bar.

Good morning.
It's Smeared Ink Day in this glorious month long hop. I have added to the little meander book of 4"x4" pages that I had started here. It will feature (eventually) all the Smeared Ink Hallowe'en Grumpies with various embellishments.
First up it's the little Ghostie Grumpie

Stamped with stazon onto pearlised card. The gravestone is a diecut/embossing plate from cuttlebug. Cut from metalised card and coloured with alcohol inks. The little bats are prickly Pear die cuts that were simply written on with the letters B O O.
The BP comes ready marbled. All edged with a drippy goo punched border.

Then we have little Grumpie Drac. Coloured with promarkers and attached to the DP  after first adding a drippy goo border torn across the top edge and painted with perfect pearls, stamped with a coffin and sentiment from Prickly Pear. The "teeth" are from Inkadinkadoo stamped onto shrink plastic and attached with a trio of tiny beads and a brad. Mustn't forget the red bloody drippy gems.

Thank you for all your kind comments after visiting my humble abode. I look forward to meeting you all tomorrow.

Tuesday, 8 October 2013

Day 8 of 31 Days of Hallowe'en

For full deets on this Freaking fangtastic Blog hop organised by Smeared Ink and The Smeared and Smudged forum, please hop on over to Terra's blog. All the info on the days sponsors are there as well as any other info you think you might need.  The blog hop roll is there in my side bar.

Good morning.
How many are still with me on this, the second week of the month long blog hop?
Today's offering is made using a couple of images from the Voodoo rubber set from Smeared Ink Rubber Club. Just one of the sets designed by Rick St Dennis.

 The box lid before and after treatment with 3 coats of clear EP then added "Aged Hunter" frantage EP to the corners. Cracked and some vintage paper DI rubbed in before attaching to the homemade box lid.
The box was made to contain a little pendant.
The image cut to size to fit in the shop bought pendant that is now "slightly" altered. 

So whilst you're making for the 31 days of Hallowe'en hop - don't forget to make an "ALL SMEARED INK" project and enter into the challenge at Smudgy Antics.

Thank you for looking and for all your marvellous comments. Off you pop to the talented Loren

If you're interested, the small candy I am offering personally is still ongoing - go back and see my post for saturday.

Tuesday, 24 September 2013

Broken Heart

The new challenge over at Smudgy Antics this week is

BROKEN HEART
We have all been there...crying our eyes out because somebody we loved broke our hearts. If you haven't had a broken heart, I'm sure you helped one of your best friends mend their broken heart or watched your children get their hearts broken. This fortnight we want you ladies and gents to create a project depicting a broken heart or being broken hearted.
How will you show what a broken heart means to you

I made an art journal page. Or rather I started one. There's still something missing on this for me. Time unfortunately  ran away from me and this is it so far.
I have used tissue paper covered gesso as my base. Whilst it was still wet, I randomly stamped the "Broken Heart" from the Smeared Ink Rubber Club December set, "Heart Wings" over it. I began to hate the drying time needed.
In the meantime I made a mould of the same rubber stamp using toilet tissue and water. More to dry before I could do more.
A paint wash was applied to the main page and the stamped images picked out with a greeny blue wash. The whole thing was dry brushed with copper to pick out the top ridges. The toilet tissue heart was cut out and carefully painted with the same wash as the base. The valleys formed by the stamp ridges picked out with blue paint. The whole thing then sealed with distress stickles.
some orange cordage adhered to the stamped heart shapes but making sure the ends did not meet - they are broken after all.
The text stamps "Love" (crossed out) "Broken" and "Heart" have been heat embossed in black.
Tip to self - make sure every thing is totally dry before carrying out the heat embossing - the heat applied to the not quite dry gesso has caused the text lines to "separate". I'll have to cover this with something and re-apply the text. We live and learn. That's what AJs are all about, isn't it. Trying new techniques.

Thanks for looking folks and come on and show us at Smudgy Antics what this Broken Heart theme means to you.

New RSD rubber

I couldn't think of another title for this post other than to describe what I'm showing. The new rubber stamps issued in September from Smeared Ink's Rubber Club.
I have been lucky, as a member of the Smeared Ink DT to have these images sent in digi format but these will not be available in the shop, You'll have to join the rubber club to get these. For my project I used the skull topped archway, gravestone and that house perched on the crags. I also used two of Smeared Ink's new digi papers from the "Honor the dead range". These come in both 12"x12" and A4 format and so very handy to resize to fit any project.
Enough of my waffle,
I used the back of a box canvas to make this.
After a quick coat of gesso to seal, the papers were stuck on and some "lightening" bolts added with silver gel pen.
The images - they were all coloured with promarkers, mostly in shades of grey with just a few shades of brown and green here and there.

I forgot to scan them before fussy cutting and adding to the canvas. I can never capture every aspect of 3-D work in just a couple of piccies unfortunately.

Anyway....
If you do decide to join the Smeared Ink Rubber club to be able to get your set of these stamps, please mention that I sent you. Thanks

I'd like to enter this canvas into the challenge at
Graph'It markers - colour an accessory/no characters. (Hopefully this fill the criteria.)

Monday, 9 September 2013

Get Embellishing - With Smudgy Antics

Week one of the challenge over at Smudgy Antics. This next two weeks we're making it super easy for you all. The only thing you must have on your project, apart from a stamped image (real or digi) is embellishments. We're not even going to tell you what embellishments to use. It's preferred that you come out of that comfy box but, even if you feel you can't, we're not going to stop wanting to see your art.
Even I have gone all cute - in a Grumpie kind of way. A little mini meander book, featuring our little friends getting all dressed up for the up-and-coming Hallowe'en season. constructed from a 12"x12" piece of brown card.
The set I have is rubber from Smeared Ink's Rubber Club. Sorry, the digi format is no longer available.
So far I've only got three pages finished, sorry but these are they.
The front cover
embellished with bat sequins, black gems and ribbon

 first page 

embellished with pumpkin sequins and ribbon

second page

 embellished with a gauze bandage, ric-rak felt and a sticky plaster.

The book has integral pockets that will hold little tags and/or photos of my grandchildren when they go trick or treating. 
The papers used so far are from Echo Park, My Minds Eye and Carta Bella. The images were stamped with memento and coloued with promarkers except the Mummy - he was stamped with stazon onto gauze and just cut out. All embellies are from stash.

Please come along to Smudgy Antics and show us what embellishments you have chosen to use after visiting my uber talented teamies and seeing what they came up with.

Monday, 26 August 2013

It's ATC time at Smudgy Antics

The start of a new challenge today over at Smudgy Antics, Really simple - make an ATC. A 2.5"x3.5" piece of art. What could be simpler than that? The hardest thing about it is choosing the stamps you'll use.
I chose 4 of the smaller stamps in the "Morte" rubber set and one of the larger for the background. Fabulous images drawn by Rick St Dennis exclusively for the Smeared Ink Rubber Club. I'm eagerly awaiting the second set and there are a further two sets coming out as well. More about them later.
My ATC
Some paper piecing and a lot of fussy cutting here. The goblet and the bottle in the foreground were stamped onto vellum. The goblet's skull was cut from cream coloured card 3 times, each layer slightly smaller and layered up. The decanter - the liquid was cut from some green paper and layered behind and the skull on top layered on top. Gold miri card cut for the decanter's stand. The candle on the skull at the back is also layered up. The trio of decanters cut from another scrap. The wall of skulls stamped onto the ATC them distress inked before layering my pieces onto the ATC.
 This shows the layers better.
Some small gems (3mm and 1mm) glued to the goblet where the stamp has them depicted.

The other girls have worked their magic and made some fabulous ATC's for you to ogle. So go have a peek. Then come and link yours into our challenge at Smudgy Antics. See you there.

I'd like to enter this ATC into the challenge at
Challenges 4 Everybody - Anything Goes
Left Of Centre - LOC or girly
Happy Campers - Use a stamp
Incy Wincy Designs Challenge - Create an ATC

Friday, 19 July 2013

VooDoo with Smeared Ink and Rick St Dennis

I'm one of a handful of lucky people that have been able to play with new images drawn by Rick St Dennis exclusively for the Smeared Ink Rubber Club. They won't ever be available as digi but as a DT member of Smeared Ink, I get to sample in this format - just to give you all a preview.

The set in question......
aren't they just fabulous!!!  You KNOW you NEED these,  mmwwwaahahaha. Pop along to the shop and tell them Croms sent you.

This is the fatbook page I made using just one of them.


Printed out 4 times, coloured with promarkers and bits fussy cut out to give some dimension.

The feathered edge to the image was done using black distress ink and a paint brush. The FB page background is using one of the papers from Crafty Chaos. There's a stencilled Andy Skinner skull peeking out, Some black diamonte pins, white and black feathers and a knotted  bit of orange cord to finish it.

Have I whetted your appetite? I hope so. Be on the look out for more samples from the team. Come along and join us on facebook at Smeared and Smudged and the Smeared Ink Rubber Club. Also Rick St Dennis has a facebook group where there is always new and exciting news about more of his images. There's always the Smeared and Smudged forum as well.  There - spoilt for choice? Join in on all of them!

I's like to enter my fat book page into the challenge at
I Love Promarkers - Anything goes


Monday, 24 June 2013

Drip Drip Drip with Smudgy Antics

Blogger and I had better stay friends today as this is not the last post I have to make.
This time we're with Smudgy Antics and the continuing challenge there of
Dripping
I often ask my son for ideas when faced with a subject theme. He has a similar warped brain to mine. A true mother's son. His idea though was not taken up. He immediately thought of food and the dripping one gets from roasting meat. OK I had to think on this one myself.

The other members of the DT have come up with such imaginative ideas, I felt a bit overwhelmed. I played safe and went with paint. That medium lends itself so well to drips. I also wanted to play with my gelli plate that has been neglected for too long.
My background sheet

some green and blue paints then off white into which I stamped into with the bark rubber stamp from the Urban Decay set available as a member of the Smeared Ink rubber club. Some bright green acrylic pain then made into a wash and splattered on an the paper tilted so that it ran.
Next up came one of the images from a past rubber set called "Prints". These are still available if you want to sign up. There are so many awesome stamp sets available.
The sheet with image attached to an ATC with a little strip of paper punched using my "drippy goo" punch.
I didn't stop there however.
I wanted a sentiment but didn't want to hide any of this pic. I was also asked to do a tutorial on an ATC I made last week. I used this ATC as the subject of that tutorial.
So another slider ATC was begun.
More images from the "Prints" rubber set.
and the Urban Decay set for the base
All put together

The words - well they are letters, stamped individually onto the bottom slider that had previously been stamped with the same bark stamp as on the gelli plate topper.

The tutorial will be with you sometime this week, with all kinds of luck.

Thank you for reading my ramblings and I'll be back later with some more news from the Cubbyhole.
Don't forget to come on over to Smudgy Antics and drip with us this week.

I'd like to enter this ATC into the challenge at
Anything BUT a card - Get Messy

Sunday, 9 June 2013

Smilin' Joe Skull

Just for fun, in amongst all the b'day cards, fathers' day card, wedding card. All for celebrations this month.
I made an ATC. I finally coincided with the ATC challenge over at Wicked Wednesday ATC Challenge Blog. The theme over there this week is
Headstones and Graveyards 
and they have an awesome sponsor as well - Smeared Ink.
Well, having so many stamps that fit in with this theme - I had to have a play. Didn't I?

I used one of the stamps from The Holy City set from Smeared Ink as my background stamp. (This is now available only in rubber. Follow my link to see more info on joining the club to get yours.) Added a bit of colour with promarkers.
The gravestone is a die cut with some of the embossed bits picked out with gel pen.
The fabulous skully image is Smilin Joe Skull with Roses and is just one of the new range of skull images from Rick St Dennis. I have featured in the recent past other fabulous skully images from the pen of our Rick that are now only available from Smeared Ink Rubber club. So even more reason to click on these links.

I digress
My ATC
I added some tiny white rose buds to the mix as well after a touch of caramel promarker to the edges. Well, when white roses are "past their best" they do start going brown. The text is from an Indigo Blu rubber sentiments collection. I just cut it up a bit to fit on the grave stone.

I would like to enter my ATC into the challenge at
Wicked Wednesday ATCs - Headstones and Graveyards
Left of Centre - Anything LOC

Tuesday, 4 June 2013

2013 Skull-a-bration Day

I can hardly believe a whole year has passed since the massive bloghop of 2012 celebrating the beauty of the cranium. This little (???) party has been organised by the gals over at Smeared Ink/Smeared & Smudged forum and is only a small part of the world wide tribute to that bony shell that contains our brain. For more info on the world wide event, the Skull-A-Day Blog and for the Smeared & Smudged participation, follow the links.

If you are following the hop order then you will have arrived, and still be reeling, from the amazing Bombshell Girls creations. If you have arrived here just on the off chance, then may I suggest that you start up at Terra's blog and see the whole wonderful array from start to finish? If you're just lost - well the whole blog hop order is there on the left hand side bar of my blog.

I have two projects to show today.
The first features just one of the images that are to be only available through the Smeared Ink Rubber Club for June. This project was created using a digital version. As a member of the DT, I was lucky enough to be able to use this as a preview. The set is called MORTE and created using the fabulous artistry of Rick St Dennis who has now joined the Smeared Ink's awesome collection of artists. You really need to check this collection out!!
If you are a lover of Rick's fabulous work and can't wait for the rubber set then why not head on over to his Etsy shop and have a look at the selection of Skull images there.

An altered cigar box.


different aspects here of the entire box, showing the dimension of the decoupaged front and the stencilled sides and back (Andy Skinner). The image was coloured with promarkers on both top and front. Because of the limitations of the light available here in Scotland, I scanned the image before attaching to give a better idea of the colour. That's distress ink you see colouring the white card base.

The paper covering and lining the box was purchased from Crafty Chaos, who sadly are no longer trading. The "wrought iron" on the corners are from a Sheena Douglas set of rubber stamps.

The second project is an altered key cabinet


This is lined with papers from the same Crafty Chaos papers. The whole box was washed with acrylic paint before the addition of gold metallic rubbing wax on the edges. Various rubber stamped images from Smeared Ink's Quoth The Raven, Lost Coast and Tim Holtz were then adhered. The side edges covered with a copper coloured ribbon and punched paper using MS drippy goo. The hooks that came with this salvaged piece need to be replaced. The white plastic covered ones really do not "go".

Thank you all for taking the time to visit my little corner of bloggy world and hope you enjoy the rest of the amazing projects. Again, if you get lost, the left hand side bar here contains all the blog addresses of the other artists that have dedicated their time and join with me in this Skull-a-bration blog hop.

Both my projects fit the bill of the challenge at Craft My Life - a re-launch of the challenge blog where anything but a card is the norm
They also fit the challenge at Created with Love - Anything Goes. Who doesn't just love their noggin?
The challenge over at Simon Says Stamp is to use the letter S in projects, well I have loads of SKULLS here so would like to enter into this challenge as well.
The Hobby House challenges have an Anything Goes challenge this month as their first ever challenge